
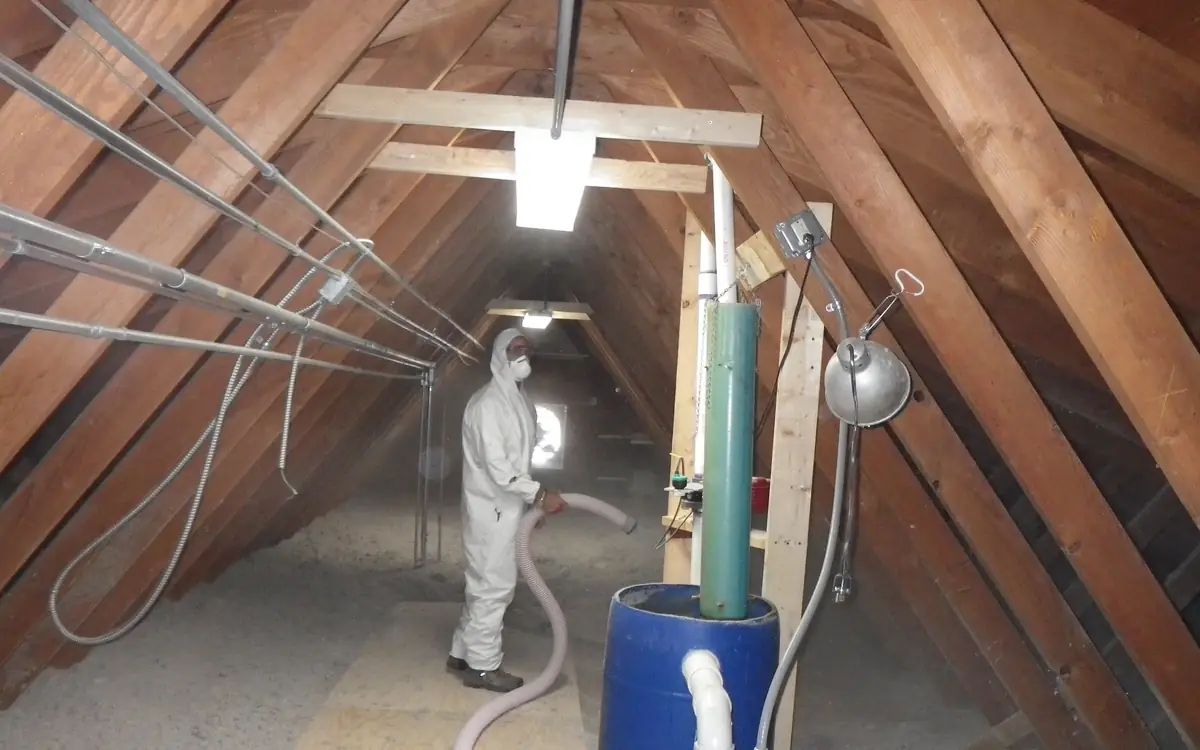
Twenty Sheets Through the Hatch on a Saturday
Eighteen millimetre tongue-and-groove flooring board, cut down in the driveway to pass a hatch framed between joists at 600 mm centres, fed up one piece at a time and screwed to the joist tops. By four in the afternoon there is a floor across the middle of the loft, the boxes are up, and the job looks finished. It is the most common piece of DIY carried out in a roof space and the most common way of quietly undoing an insulation upgrade somebody paid for.
Two separate things went wrong in that one afternoon and they have nothing to do with each other. The thermal failure is that the insulation is now capped at the depth of the joist — a hundred millimetres, four inches, whatever the original carpenter used — and wherever the quilt stood proud of the joist top it has been squashed flat. The structural failure is that a member sized to hold up a plasterboard ceiling and a blanket is now carrying stacked boxes, a person standing on them, and the deck itself, for the rest of the building's life.
Neither announces itself. What arrives eventually is a crack along a plasterboard joint in the bedroom below, or a survey a decade later reporting a hundred millimetres of insulation in a house certified at three hundred. The rest of this page is the same job done so that neither turns up, and the sequence matters more than the components: what is up there, how deep it needs to be, how high the deck has to sit, where the legs land, and what never gets boarded over at all.
What a raised loft deck is made of
- Storage deck — flooring-grade panel bought by the sheet and cut to pass the hatch, its support centres set by the maker's declaration rather than by its thickness Plywood and OSB Sheet Calculator (Subfloor, Wall and Roof)
- Legs and bearers — the raised frame that carries the deck clear of the insulation, every leg landing on a joist centreline and never between two
- Cross layer over the joists — laid or blown at right angles to the framing so it bridges the timber, and the layer a deck screwed to bare joists makes impossible Blown-In Insulation Bag Count Calculator
- Quilt between the joists — friction-fitted full width, taken to the wall plate but never packed into the eaves ventilation path Insulation Batt Calculator
- Ceiling joists or truss bottom chords — the members every leg has to find, counted and marked before the insulation is disturbed and hides them again Ceiling Joist Spanning Lineal Lumber Aggregator
- Plasterboard ceiling — the finished surface below, and the thing that cracks first when a chord deflects under a load nobody designed it for
The Ceiling Was Never a Floor
Two roofs turn up and they behave differently. A cut roof, built in place, has ceiling joists that are proper timbers running wall to wall, often carried on a binder or a partition part-way across. A trussed roof — near universal in British housing since the late 1960s and in American housing since the 1970s — has no ceiling joists at all. What you are standing on is the bottom chord of a triangulated frame, sized as part of that frame and connected at every intersection by a punched metal plate pressed on in a factory.
The distinction matters because a bottom chord is a working member in tension, not a spare beam. Its size came from the truss designer under ANSI/TPI 1 National Design Standard for Metal Plate Connected Wood Truss Construction, or under BS 5268-3 Structural use of timber — Code of practice for trussed rafter roofs and now BS EN 1995-1-1 Eurocode 5, against a stated set of loads. Storage that was not in that set is a change to the design case. The IRC states the loads plainly in Table R301.5, Minimum Uniformly Distributed Live Loads: attics without storage and attics with limited storage are different numbers, and habitable attics served by fixed stairs are a third and much larger one. The footnote deciding which line applies turns on the clear height between the joist top and the rafter — exactly the dimension a raised deck eats into.
In the United Kingdom the equivalent split sits in BS EN 1991-1-1 Eurocode 1: Actions on structures, with the UK National Annex, which separates a roof reachable only for maintenance from a floor used for storage. The imposed load for the second is a multiple of the first, and that multiple is the whole reason "it is only cardboard boxes" is not an argument. Boxes of books are not cardboard. A loft is where a household puts the heaviest, densest, least-used objects it owns, and it keeps adding to them for twenty years.
Three positions follow. Board a defined island rather than the whole ceiling, because an unbounded floor becomes an unbounded load. Put the island where the load path is shortest — near the supporting walls, and on a trussed roof over the panel points where the webs meet the chord rather than out in the middle of a long unbraced panel. Treat anything beyond household boxes as a question for an engineer. And do not alter the frame: the IRC's wood truss provisions in Section R802.10 require a registered design professional's written approval before any truss member is cut, notched or otherwise altered, and British practice is the same by way of the truss designer. That includes trimming a web out of the way to make room for a deck, which is the most tempting move in the loft and the one you must not make.
Capacity is not the only limit. A chord can be inside its strength check and still deflect enough under sustained load to open the plasterboard joints beneath it, and timber creeps — deflection under a load that sits there for fifteen years exceeds deflection on the day it was placed. That is a serviceability problem with a cosmetic symptom, and it is why a boarded loft usually shows up as a ceiling crack rather than as anything dramatic.
Read the Depth That Is Already Up There
Go up with a rule, a torch and a dust mask and take the depth in four or five places well away from the hatch. Rake a small trench down to the plasterboard and read from the top of the ceiling board, not from the top of the joist. Loose fill settles over its life, so a figure written when the house was built, or when a grant scheme paid for a top-up, describes a thickness that no longer exists. Where a previous deck exists, lift a board and look under it: that is where the compressed material is, and where real performance is furthest from the paperwork.
Identify the material while you are there, because one of them changes the job. Loose fill with a grey, glassy, pellet-like texture may be vermiculite, and vermiculite from certain historic sources is contaminated with amphibole asbestos — at which point the next step is sampling and analysis by a competent person, not raking. That sits under OSHA 29 CFR 1926.1101 Asbestos and the US Environmental Protection Agency's guidance on vermiculite attic insulation, and under the Control of Asbestos Regulations 2012 in Britain. Nothing else on this page applies until it is settled.
The number that matters is the resistance of the assembly, not the depth on its own, and the assembly includes the framing. Joists at 400 or 600 mm centres occupy roughly a tenth of the ceiling area and conduct several times better than the quilt between them — softwood sits near 0.13 W/m·K against roughly 0.038 to 0.044 for mineral wool. That bridge is why a cross-laid layer over the joist tops does real work, and it is precisely the layer a deck screwed to bare joists makes permanently impossible.
Stack the existing ceiling as it actually is, between the joists first — plasterboard, then the quilt at its measured settled depth turned into a resistance — then run it a second time with the joist standing in place of the quilt rather than added on top of it, because timber is a parallel path through the ceiling and not another layer. The lower of the two answers is the one the target has to improve on, not the figure on an old certificate.
The R-value of your main insulation layer, printed on the product.
The R-value of a second layer, like exterior sheathing.
The R-value of interior finish material, like drywall (typically about R-0.45 for 1/2 in).
Total assembly R-value
15.8 R-value
- Sum of material layers
- 14.95 R
- Air film allowance
- 0.85 R
They open the calculator with your figures already in it
R-Value Calculator: 15.8 R-value — shown in imperial, US market. The link sets both, so the result they see is the one on your screen.
Add the equipment this sizes
This result is a specification — 15.8 R-value — not a quantity. Put the thing it sizes into your project: how many, what you call it, and your supplier’s price.
What this calculation does not cover
- Layers are summed straight through the insulated cavity. Studs, joists, plates, headers and rim areas conduct several times faster than the insulation between them and are not deducted here, so the real whole-wall or whole-ceiling figure is lower than this total. Run the Thermal Bridging Effective R-Value Calculator on the same wall to see by how much.
- The figures are imperial R-values in hr·ft²·°F/BTU, and so is the fixed R-0.85 air film allowance. Metric RSI values in m²K/W are about 5.68 times smaller, so entering those makes the film allowance alone roughly six times too generous. Convert before you type.
- The air film allowance is one fixed number written for a wall: still indoor air with sideways heat flow, and an outside face exposed to wind. It does not change for heat flowing up or down, for a surface facing a vented attic or an enclosed crawl space, or for a reflective low-emissivity face, all of which shift the film values.
- Product R-values are lab ratings for material at full thickness with no gaps. Batts compressed under wiring, voids at plates and corners, and loose fill that has settled all deliver less than the printed number, and nothing here downgrades the total for installation quality.
- R-value covers conduction only. It says nothing about air leakage, wind washing through the insulation, or moisture in the assembly, and this total is not a code compliance check: the required figure depends on climate zone and on which element you are building, and codes are frequently verified against a whole-assembly U-factor that includes the framing this sum leaves out.
The Raise Height Is a Subtraction, Not a Preference
One line of arithmetic sits under this whole job. Raise height equals the finished insulation depth you are aiming for, minus the depth of the joist you already have, plus a working clearance between the top of the insulation and the underside of the deck. Everything else follows from the answer, and getting it before shopping is what stops somebody buying a fixed-height product thirty millimetres short of what the assembly needs.
The first term is not yours to invent. Finished depth comes out of the energy standard the jurisdiction has adopted and amended: Approved Document L in England, the International Energy Conservation Code and the IRC energy provisions across most of the United States. Those documents set a target as resistance or as a U-value, never as a thickness, and the thickness delivering it depends on the product, because loose glass wool, blown cellulose and rock wool are not interchangeable per inch. Read the version in force at the address, then convert using the material you will actually buy.
The second term is measured, not assumed. Joist depths in older British lofts are frequently 100 mm and sometimes less; modern trussed rafter bottom chords are commonly shallower than the ceiling joists people expect, often in the 72 to 97 mm range, which makes the shortfall against a modern target larger than it looks from the hatch. Measure it, in several places, because a loft with a later extension often has two different framing depths meeting under the same insulation.
The third term is the one people leave out. A deck resting on the settled surface of loose fill compresses it at every contact point and means you can never rake it level again without lifting the floor. Leave daylight — a couple of centimetres or an inch is plenty — so the deck bears only on its legs. And remember the ceiling above the deck as well as the one below it: on a trussed roof the webs cross the storage zone at a height that has nothing to do with where you want to walk, and on a cut roof the purlins do the same. Measure headroom to the underside of the lowest member over the proposed island, not to the ridge.
- Take the settled depth of the existing insulation in four or five places, measured up from the plasterboard.
- Measure the joist or bottom chord depth in at least two places, and again in any later extension.
- Get the target resistance from the adopted energy standard, then convert it to a depth in the product you intend to buy.
- Subtract the joist depth from the target depth, add the working clearance, and that is the leg height.
- Check the answer against headroom to the lowest web, purlin or collar over the boarded area before ordering anything.
- If the leg height you need is not a height the product is sold in, go up rather than down and pack the difference into the bearer.
Take the resistance you established for the existing ceiling, set the target the adopted standard asks for, and read the additional depth for the specific fill you are buying — that depth is the first term of the leg-height subtraction.
Your attic's existing insulation R-value.
The recommended attic R-value for your climate zone.
Different materials need different depths to reach the same R-value.
Additional insulation depth needed
12 in of additional insulation
R-per-inch varies somewhat by brand and how densely the material settles over time — check your specific product's published R-value chart.
- Additional R-value needed
- 30 R
They open the calculator with your figures already in it
Attic Insulation Upgrade Calculator: 12 in of additional insulation — shown in imperial, US market. The link sets both, so the result they see is the one on your screen.
Add the equipment this sizes
This result is a specification — 12 in of additional insulation — not a quantity. Put the thing it sizes into your project: how many, what you call it, and your supplier’s price.
What this calculation does not cover
- The model uses one nominal R-per-inch per material — blown fiberglass 2.5, cellulose 3.7, mineral wool 3.0. Real loose-fill R-per-inch shifts with installed density and with how far the material settles, so install to the depth your product's coverage chart gives for that R-value. This returns depth only: no bag count, no coverage per bag.
- The depth is sized for the insulation on its own. Joists and truss chords bridging the fill, thin coverage at the eaves and around penetrations, and air leakage through the ceiling plane all leave the finished ceiling below the target R. Air sealing the ceiling plane before you blow is usually worth more than the last increment of depth.
- Nothing here checks whether the attic can take the added depth. Soffit baffles and eave clearance, ventilation, joist height and any loss of walkway or storage, clearance around chimneys and flues, recessed lights not rated for insulation contact, and knob-and-tube wiring are install and fire-safety questions this calculation does not touch — settle them before ordering.
- Your current R-value is taken at face value. Settled, compressed, wind-washed or damp insulation is worth less than its depth times a published R-per-inch, and material that is wet or rodent-fouled has to come out rather than be covered. Neither condition is detected here.
- The target is whatever you type: no climate zone lookup, no energy code or rebate threshold check, and no payback, energy saving or condensation risk assessment. Both R-value fields are US customary R (ft²·°F·h/BTU) — RSI figures entered here return a depth several times too shallow.
Where the Legs Land
Every leg has to sit on a joist, over its centreline, and nowhere else. A leg landing between two joists is standing on plasterboard, and plasterboard will hold it right up until somebody kneels on the deck above. That sounds too obvious to state until you remember that by the time the legs go in the joists are buried under a blanket, and the person fitting them is working from memory and a torch.
So mark first. Pull the insulation back along a couple of lines, find the joists, and snap a line across the whole area so the rows are set out from a datum rather than measured one at a time off the last leg. Note the spacing while you are there: British and American framing both cluster at 400 and 600 mm, sixteen and twenty-four inches, but old cut roofs wander and an extension rarely matches the original house. Photograph the marking before it is covered again — that photograph is the only record anyone will have of where it is safe to put a screw.
Fixing into a truss chord has its own rules. Screws go into the top face only, short enough that the point cannot break through the underside into the ceiling — a point through a 72 mm chord is both a structural nick and a visible dimple in the bedroom. Nothing gets driven into or beside a punched metal plate, because the plate's holding capacity depends on teeth in undamaged timber. Never notch a chord to seat a bearer flush, and never drill one to pass a bolt.
There are two ways to set out the frame and they buy different quantities. Bearers running along the joists put every leg over solid timber and let the deck span across them. Bearers running across the joists need legs only where a bearer crosses a joist — fewer legs, a stiffer bearer, and the deck's own span turned the other way. Draw both for your actual island before ordering; on a deck of any size the difference is dozens of components.
Whichever way round it goes, the leg count comes off the joist count and the row spacing, and the joist count is the thing people guess at. Work it from the boarded area's own dimensions and the spacing you measured, not from the whole roof: the answer tells you how many chords cross the island, which sets how many legs a row contains and how much bearer timber the island consumes.
Enter the dimensions of the boarded island rather than the whole building, with the spacing you actually measured, and the count of joists crossing it comes out alongside the run of timber over it — which is the number the leg and bearer order is built from.
The overall length of the building, along which joists are spaced.
The building width, which each ceiling joist must span.
The on-center spacing between joists.
Total ceiling joist lumber needed
507 ft
- Number of joists
- 26
- Whole bays between joists
- 24
- Short bay at the last joist
- 12 in
They open the calculator with your figures already in it
Ceiling Joist Spanning Lineal Lumber Aggregator: 507 ft — shown in imperial, US market. The link sets both, so the result they see is the one on your screen.
Estimated cost — your price
This site holds no price list for this material — local prices vary too much to publish honestly. Enter your supplier's price and the result is costed with it.
What this calculation does not cover
- The total is the in-place length of the joists, not the lumber to buy. It assumes every joist runs the full building width as one continuous piece, so it excludes off-cut waste, the extra material where a span longer than the available stock length has to be made up from two members, and the overlap itself where joists lap over a central bearing wall. Minimum lap length at the bearing is jurisdictional.
- Nothing here tests whether the joists can carry the span. No section size, species, grade, deflection limit or attic loading is asked for, so an 8 m clear span at 24 in centres is aggregated just as readily as a span well inside a published span table. Allowable ceiling joist spans shorten as spacing widens and as attic storage loading is added, and the governing deflection limit is stricter for a plastered or boarded ceiling than for an unfinished one; both are jurisdictional.
- The two building dimensions are not interchangeable, so the answer depends on which one you enter as length. A 12 m by 8 m building at 24 in centres returns 160 m of lumber, while the same building entered as 8 m by 12 m returns 168 m. Joist direction is fixed by the bearing walls and, in a pitched roof where the ceiling joists also act as rafter ties resisting outward thrust at the wall plate, by the rafter direction; the calculator has no notion of that thrust or of the tie connection at each end.
- Only plain field joists are counted, with nothing added and nothing taken away. Blocking, strutting or herringbone bracing at mid-span, rim and end joists, hangers, strongbacks and ceiling binders are all outside the total, and no joists are subtracted where a stairwell, loft hatch or vaulted section interrupts the run. The span above which intermediate rows of strutting become a requirement is set by local rules.
The Panel's Declaration Sets the Centres
A loft deck is a floor panel and it is governed like one. Its allowable support spacing is declared by the manufacturer against a bending and stiffness performance; it cannot be deduced from thickness or from how solid a sheet feels underfoot on the ground. Chipboard flooring sold in Britain is classified under BS EN 312 Particleboards — Specifications, with P5 the moisture-resistant flooring grade, and the documentation under BS EN 13986 Wood-based panels for use in construction states the centres. North American panels carry the answer in the trademark under Voluntary Product Standard PS 2 and the APA panel specifications: a span rating pair on sheathing gives roof spacing first and floor spacing second, while a Sturd-I-Floor panel carries a single floor rating.
Two consequences follow. Thicker board is not a licence to widen the leg grid unless the declaration says so — the declaration carries the load, not the millimetres. And a full sheet does not go through a loft hatch: an opening framed between joists at 600 mm centres is under 600 mm wide before the lining goes on, so sheets get cut in the driveway into pieces that will turn up a ladder, and cut sheets do not nest the way whole ones do. Every cut edge has to land on a bearer, because an unsupported panel edge in a floor is a hinge. Allow more waste than a clean rectangular floor would need.
| Panel | What governs the spacing | What that means on site |
|---|---|---|
| P5 chipboard flooring to BS EN 312 | The maker's declared maximum support centres | Printed on the pack or the declaration of performance; thinner board means closer centres, not a thinner floor at the same grid |
| Structural plywood or OSB to BS EN 13986 | Declared bending strength and stiffness class | Two panels of the same thickness in different classes are not the same deck |
| APA Rated Sheathing | The span rating pair in the trademark | The second figure is the floor spacing; the first is roof only, and using the first as a floor number over-spans the panel |
| APA Rated Sturd-I-Floor | The single span rating in the trademark | Sold as a floor panel, so the rating is the number you set bearers to |
| Any panel over a cut edge | Edge support, not span | Cut edges land on a bearer or get blocking; an unsupported edge deflects independently and telegraphs through |
Size the island in sheets before the frame is set out, and push the waste allowance up rather than down — the cutting needed to get material through a hatch is the reason a loft deck consumes more panel than its area suggests.
SettingsSettings for this calculation
The standard allowance most suppliers and estimating guides assume for ordinary work.
The length of the floor, wall, or roof area.
The width of the area.
Extra sheets for cuts around edges and openings.
Estimated plywood and osb sheet (subfloor, wall and roof) needed
18 sheets (4x8 ft)
Sheet counts are a bin-packing problem rather than an area division. A sheet cut into two pieces that both get used is efficient; one cut into a piece you need and a remnant nothing fits is a whole sheet consumed.
- Area to cover
- 507 sq ft
They open the calculator with your figures already in it
Plywood and OSB Sheet Calculator (Subfloor, Wall and Roof): 18 sheets (4x8 ft) — shown in imperial, US market. The link sets both, so the result they see is the one on your screen.
Estimated cost — your price
This site holds no price list for this material — local prices vary too much to publish honestly. Enter your supplier's price and the result is costed with it.
What this calculation does not cover
- Assumes sheets can be cut freely. Sheathing with a required panel orientation, or a face grade that must run one way, reduces what can be nested.
- Excludes fasteners, adhesive, blocking at unsupported edges and the H-clips some sheathing applications require.
- Does not account for the expansion gap between sheets, which most sheathing applications specify and which changes how many sheets a run needs.
Putting the Depth Back Over the Top
The insulation goes in after the frame and before the deck, and the reason is access: once boards are down, the space beneath them is reachable only by taking boards up again. Between the joists the quilt is friction-fitted full width, cut generously rather than tightly so it stays in contact with the sides of the joist as the timber moves. Over the joist tops the cross layer runs at right angles to the framing, unfaced and continuous, and ASTM C1320 Standard Practice for Installation of Mineral Fiber Batt and Blanket Thermal Insulation for Light Frame Construction is explicit that it is not to be compressed and that a second vapour retarder facing pointed up into the void is a defect rather than a bonus.
Loose fill under a raised deck is a sequencing decision, not a product one. It can be blown once the legs and bearers are standing but before the boards go on, which is the tidy way, or through a lifted board later, which is how it happens on most retrofits. Either way the bag count and the settled depth are read off the manufacturer's coverage chart together, never one without the other: the labelling making that chart mandatory in the United States is the R-value Rule at 16 CFR Part 460, and installation practice sits in ASTM C1015 Standard Practice for Installation of Cellulosic and Mineral Fiber Loose-Fill Thermal Insulation. Depth hit on a short bag count means a density below the chart's, and it will settle further.
Detail the legs. Every leg is a small penetration through the insulation plane, and a grid of legs with a finger of daylight around each one is a grid of small holes right across the storage area. Batts get cut to close against them; loose fill gets raked in around them and topped. Do the same at the perimeter of the boarded island, where the transition from the raised depth to the surrounding depth is a step that wants filling rather than a cliff.
One more thing about the area under the deck: it is the part of the ceiling nobody will ever top up again. If there is an argument for being generous with depth anywhere, it is here, under the boards, where the next occupant has no realistic way of adding to it and no way of even seeing what is there.
Put the boarded island's area and the settled depth you decided on into the bag arithmetic using the yield printed on the chart for that depth — bag count and depth are one figure with two halves, and quoting either alone is how a loose-fill job comes up short.
The attic or cavity area to be covered with blown-in insulation.
The target settled/installed depth of loose-fill insulation.
The volume of coverage one bag provides at the target installed depth, per the manufacturer's chart.
Bags needed
12 bags
Bag yield depends on the target installed density, which varies by depth and product per the manufacturer's coverage chart — always use the yield figure printed on the bag for your specific target depth/R-value, not a generic assumption.
- Total insulation volume
- 39.17 yd³
They open the calculator with your figures already in it
Blown-In Insulation Bag Count Calculator: 12 bags — shown in imperial, US market. The link sets both, so the result they see is the one on your screen.
Estimated cost — your price
This site holds no price list for this material — local prices vary too much to publish honestly. Enter your supplier's price and the result is costed with it.
What this calculation does not cover
- Depth on a ruler is not R-value, and the bag count is what proves it. A coverage chart ties each R-value to a minimum number of bags per unit of area as well as to a depth, so a yield taken from a lower-density line gives fewer bags at the same finished depth — the attic measures right, performs below its rating, and nothing on site catches it afterwards.
- Attic yields do not transfer to closed cavities. Dense-packing a wall or a cathedral cavity is done at a far higher density to stop the material settling and leaving a void at the top, which cuts the coverage a bag gives by half or more, and the fill goes in through a tube around fire blocking, wiring and bracing rather than being blown across an open floor.
The Eaves Do Not Get Boarded
A raised deck makes the roof void colder, not warmer. That is the point — more heat stays below the ceiling — but a colder void is one where moisture escaping through the ceiling plane is likelier to condense on the underside of the sheathing or the felt. Ventilation therefore matters more after this job, not less, and the roof provisions of Approved Document C in England together with BS 5250 Management of moisture in buildings — Code of practice set out how a cold pitched roof is ventilated. In North America the equivalent is IRC Section R806, Roof Ventilation, whose insulation clearance provision requires a clear airspace between the top of the insulation and the roof sheathing where vents are located.
Baffles keep that path open when the insulation gets deeper: one per rafter bay along the eave, holding the fill down and back so the soffit-to-ridge route survives the top-up, fitted before the depth goes in rather than fished in afterwards. A bay left without one is invisible from the hatch and is exactly where the cold, wet corner of the roof will be.
Then keep the deck away from the perimeter entirely. Boards run out to the eaves stop you inspecting the ventilation path, stop you restoring it, and floor over the part of the loft that performs worst anyway — the wind-washed perimeter where air moving through the eaves scours heat out of the top of the fill. An island with a metre of open, full-depth, inspectable insulation around it is the better job in every respect except the one that photographs well. While you are at the perimeter, check nothing else is being buried: a bathroom extract discharging into the void instead of through the roof is a common find, and it belongs on the list of things fixed before the boards go down.
Take the eave length over the area you are raising and the rafter spacing you measured, and get the bay count — baffles are one of the few loft items where the right number is exact rather than approximate, because a missing one is a bay with no airflow at all.
The length of the eave line where rafter bays need baffles.
The on-center spacing between rafters.
Baffle vents needed
30 baffles (one per rafter bay)
- Attic width
- 39 linear ft
They open the calculator with your figures already in it
Attic Baffle Vent Calculator: 30 baffles (one per rafter bay) — shown in imperial, US market. The link sets both, so the result they see is the one on your screen.
Estimated cost — your price
This site holds no price list for this material — local prices vary too much to publish honestly. Enter your supplier's price and the result is costed with it.
What this calculation does not cover
- The figure covers one eave line, because that is the only length asked for. A gable roof carries a soffit down each long side and needs the calculation run for each, so the 30 baffles returned for a 12 m eave at 16 in centres is 60 for the pair, and a hipped roof has eave on all four sides.
- The result counts bays, not the number of baffle sections a bay swallows. Rafter baffles are commonly sold in sections of about 1.2 m (4 ft), enough to carry the channel over the top plate and the first stretch of loft insulation, so where the vented channel must continue up the rafter — the vaulted assembly described in the FAQ, running soffit to ridge — a 4 m rafter run takes three or four sections in every bay and the quantity to order is that multiple of the number shown.
- Baffles protect an airflow path; they do not create one. Nothing here tests whether the soffit actually has vents in it, or whether their net free area meets the 1:150 or 1:300 attic rule, and a baffle fitted above a solid soffit or an uncut sheathing panel achieves nothing. Intake area also has to be balanced against ridge or gable exhaust before the channel will draw.
- The count says nothing about the depth of the channel a baffle holds open or its height above the finished insulation. A minimum clear air gap between the baffle and the underside of the sheathing is normally required — one inch is the figure most often quoted, but the clearance that applies is set by the code in force — and at a shallow eave that gap plus full insulation depth may not fit beneath the rafter at all, which is a raised-heel truss or insulation-depth question rather than a baffle-count one.
- Dividing the eave length by the rafter spacing assumes parallel, uninterrupted bays for the whole run. Hip corners with jack rafters, dormers, valleys, chimneys and the bay that dies against a gable wall all break that pattern, and the number neither removes bays with no soffit vent below them nor adds the short jack-rafter bays a hip creates.
Things That Cannot Be Buried
Cables are the first. A cable surrounded by thermal insulation cannot shed heat the way its rating assumed, and its current-carrying capacity has to be reduced accordingly — BS 7671 Requirements for Electrical Installations (the IET Wiring Regulations) covers cables in thermal insulation in Britain, and NFPA 70 National Electrical Code Article 310 covers ampacity correction and adjustment in the United States. Raising the depth over a circuit that previously lay near the surface changes its installed conditions. Clip cables above the new topping layer where they can be reached, leave slack rather than stretching runs, and get anything doubtful looked at by an electrician while the loft is still open.
Recessed luminaires are the second. A downlight not marked for insulation contact needs a maintained clear zone, and the marking on the fitting governs — not a rule of thumb about a hand's width, and certainly not an upturned flowerpot. Covers are the purpose-made fire-rated kind, fixed so they cannot be nudged off, with their positions recorded.
Third is anything that burns or carries combustion products. Flues, chimney breasts and appliance vents all have a clearance to combustibles set by the appliance listing and, in North America, by NFPA 211 Standard for Chimneys, Fireplaces, Vents, and Solid Fuel-Burning Appliances. Nothing goes inside it: not insulation, not a bearer, not a deck, and not the boxes that get pushed to the edge of the deck later. Where the clearance is close to the boarded area, build a physical barrier rather than relying on anyone remembering.
Fourth, in British lofts, is the cold water storage cistern. Sides and lid get insulated; the ceiling directly beneath it is deliberately left alone, so a little warmth from the house below keeps the tank from freezing — insulating under a cistern is a classic well-intentioned way to burst one in January. Its bearers spread the load across several joists and must not be cut, shortened or hidden by a deck built over them. Fifth is the hatch: a hole in the insulation plane the size of a small door, needing an insulated, weatherstripped lid and a dam tall enough that raised loose fill cannot pour onto the landing the first time the lid comes off.
What the Deck Makes Permanent
Air leakage through the ceiling plane earns a paragraph here for one reason: after the boards go down, the ceiling under them is sealed or unsealed forever. Whatever gets done about open chases, service penetrations, the tops of partition walls and the gaps around the hatch lining has to be done in the hour before the deck is built, which argues for sealing under the island properly even if the rest of the loft waits.
Leave a record. Photograph the joist marking, the leg grid, the cable routes and the luminaire covers before insulation hides them, and fix a card inside the hatch giving the finished depth, the product, the date and the boarded area. It is the difference between the next person working from evidence and guessing, which is where you started.
And be willing to shrink the island. Where headroom under a web or a purlin will not allow the raise the subtraction demands, the honest answer is a smaller boarded area at full depth rather than a large one at joist depth. Six square metres of proper storage over undisturbed insulation is worth more than a whole loft floored at a hundred millimetres, and it is a great deal cheaper to build.
Ordering the raise and the depth together
The deck and the insulation are one purchase, because the leg height is derived from the insulation depth and the sheet count is derived from the island the legs define. Working them separately is how a loft ends up with boards that fit and legs that do not.
- Boarded island, set out in sheets — Fix the dimensions to something the cut sizes divide into, since sheets are cut down to pass the hatch and cut material nests badly.
- Leg height, from the subtraction — Target depth minus measured joist depth plus working clearance; round up to the height the product is sold in and pack the rest into the bearer.
- Legs and bearers, from the joist count — Count the joists crossing the island at the spacing you measured, then multiply by the number of bearer rows the panel's declared support centres divide the island into.
- Deck panel, by declared support centres — Read the declaration or the trademark stamp, not the thickness, and add blocking wherever a cut edge will land off a bearer.
- Insulation, between and over — Two quantities, not one: quilt friction-fitted between the joists and a continuous unfaced layer crossing their tops. Bags and settled depth come off the same coverage chart.
- Baffles, one per eave bay — Counted from the eave length and rafter spacing, and fitted before the depth goes in rather than pushed in afterwards.
Opens the calculators above on one screen with the dimensions from this article already filled in. Quantities only — this site publishes no price list, because local prices vary too much to publish honestly.