
SettingsSettings for this calculationUS
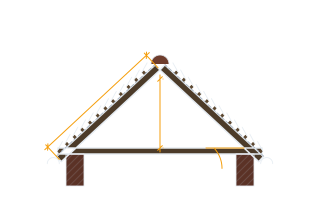
The horizontal distance from the roof's high point to the drain or low point.
Measure along the direction of the taper, from the ridge or crown to the roof drain or scupper.
The target drainage slope, expressed as a ratio (rise ÷ run).
A ratio of 0.02 (2%) is a common target and is roughly equivalent to a slope of 1/4 in of rise per foot of run.
The thinnest board in the system, laid AT the drain or scupper — the taper builds up from here.
Tapered systems are set out from the low point outward. The starter board goes down at the drain, and each successive board is thicker, so the assembly gains height as it runs back toward the ridge, crown or perimeter. That is what creates the fall. Specify it from the manufacturer's board schedule rather than assuming a nominal thickness: the starter is also the thinnest point in the assembly, so it sets the system's worst-case R-value, and some specifications set a minimum starter thickness for exactly that reason.
The board's width measured along the run, which is the direction the taper climbs.
Four feet, or 1.2 m, on almost everything sold — and it is the figure that turns a slope into a step. A board spans its own width and gains its own rise across it, so the whole system is a staircase of boards rather than a ramp, and the step is what a roofer sets out from. Take it from the board schedule rather than the panel size: some systems are supplied 4 ft wide and 8 ft long with the taper running across the 4 ft.
The thickest board in the tapered range, where the sequence has to restart.
A tapered range climbs from the starter to a ceiling — commonly about 100 mm, or 4.5 in in US schedules — and then stops, because a thicker board would be uneconomic to make and awkward to handle. Past that point the height comes from FLAT fill stock underneath and the tapered sequence starts again from the starter thickness on top of it. That is the whole reason a deep tapered roof is mostly flat board, and it is the figure that decides where the changeover happens.
Maximum insulation thickness needed
11.36 in
- Thickness rise across the run
- 9.36 in
- Board courses from the drain to the high point
- 10
- Rise across one board
- 0.96 in
- Width of the last course
- 36 in
- Courses before the taper restarts on fill
- 2
- Flat fill under the high end
- 7.36 in
They open the calculator with your figures already in it
Tapered Roof Insulation Slope Calculator: 11.36 in — shown in imperial, US market. The link sets both, so the result they see is the one on your screen.
Show calculation logicHide calculation logic
How this was calculated
Formula source(s)
- Thickness rise = run length × target slope ratio; maximum insulation thickness = minimum thickness + rise, the standard method for sizing a tapered insulation system that creates positive roof drainage toward a low point
- Rise across one tapered board = board width x slope ratio, which is why a four-foot board at a quarter inch per foot rises exactly one inch and at an eighth per foot exactly half
- Courses = run length / board width, rounded up; the tapered boards carry (thickest board - starter thickness) / rise-per-board courses before the sequence restarts on flat fill, and the fill under the high end is the total thickness less the thickest board made
Inputs used
- Run Length to Low Point/Drain
- 39 ft
- Target Slope Ratio (e.g. 0.02 = 2%, commonly 1/4 in per ft)
- 0.02
- Minimum (Starter) Insulation Thickness at the Drain
- 2 in
- Width of One Tapered Board
- 4 ft
- Thickest Tapered Board Made
- 4 in
Intermediate steps
- Thickness rise across the run
- 9.36 in
- Board courses from the drain to the high point
- 10
- Rise across one board
- 0.96 in
- Width of the last course
- 36 in
- Courses before the taper restarts on fill
- 2
- Flat fill under the high end
- 7.36 in
What this calculation does not cover
- Gives thickness, not R-value, and the thin end is where the energy code bites. The starter board at the drain is the lowest R anywhere in the assembly, so check the required minimum against that thinnest point — and against the assembly average if your code path allows one — before ordering, because raising the starter thickness raises every board above it and the whole build-up with it.
- Solves one straight fall and leaves the water between the drains. Areas behind curbs, between adjacent drains and along the high line need crickets and saddles, and because a cricket falls diagonally its own slope has to be steeper than the field — commonly double it. A roof tapered only in the direction calculated here ponds in every one of those corners.
- The last course is ripped to whatever the run has left, and a ripped tapered board carries only its own share of the rise — so the board against the high point is not the thickest board in the range, even though it sits at the thickest place. Where the rip lands is a decision the page does not make: put it at the high point and the cut edge is buried under the flashing, put it at the drain and it is under the sump, and the two are not the same job.
- The board rows assume one tapered range at exactly the slope you asked for, laid in full-width courses from the drain outwards. Real schedules are lettered sets with their own fixed slopes, and the nearest one to your target is what gets delivered — so a 1 in (25 mm) 50 target is normally built with 1/4-in-per-foot board, which is 1 in (25 mm) 48, and the finished fall is the board's, not yours. Take the courses and the fill as the shape of the system rather than as an order.
- Nothing here checks that the total fits what surrounds it, and on a deep build-up that is the constraint that bites first: flashing height at the parapet, door sills, curb heights and the depth of the drain bowl itself. A roof that needs more fill than the upstand allows is re-drained or re-divided rather than re-tapered, and that decision sits upstream of every figure on this page.
Add the equipment this sizes
This result is a specification — 11.36 in — not a quantity. Put the thing it sizes into your project: how many, what you call it, and your supplier’s price.
Computed in your browser — nothing you enter is uploaded. Presented in US customary units and US trade terminology. Where a formula follows a published standard, that standard and its edition are cited beside it on this page; where none governs, the page says so. Local amendments override model codes — verify against the code in force where you build.
Sources checked 2026-09-06 · in the site-wide review of 2026-09-06 · v1.0.1
Regulatory standards & verification citations3
- Thickness rise = run length × target slope ratio; maximum insulation thickness = minimum thickness + rise, the standard method for sizing a tapered insulation system that creates positive roof drainage toward a low point
- Rise across one tapered board = board width x slope ratio, which is why a four-foot board at a quarter inch per foot rises exactly one inch and at an eighth per foot exactly half
- Courses = run length / board width, rounded up; the tapered boards carry (thickest board - starter thickness) / rise-per-board courses before the sequence restarts on flat fill, and the fill under the high end is the total thickness less the thickest board made
Cite this page
Your workspace
Most jobs need more than one number. Add the calculators you need next and they open right here, underneath this one — your figures stay on screen and nothing is lost to a page change.