
SettingsSettings for this calculationUS
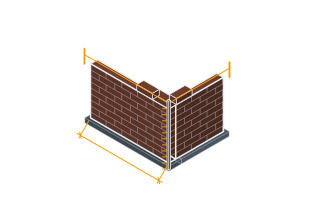
The wall height.
This is the number that sets the spacing, not merely the area. The common rule takes the LESSER of twice the wall height or 7.6 m, so below about 3.8 m the height governs and every 300 mm of error moves every joint by 600 mm. Measure the full height of the masonry from its bearing to the top course, parapet included — a parapet shrinks with the rest of the wall and cracks first if the joint stops below it.
The total length of the wall run.
The uninterrupted run of masonry between the things that already relieve it: a corner, a pilaster, a movement joint in the structure behind, a full-height opening. A 30 m elevation broken by a corner at 12 m is two runs of 12 and 18, not one of 30 — working it as one puts joints where the corner already does the job and leaves the long leg short of them.
Control joints needed
4 control joints
This is a simplified general guideline, not a substitute for a project-specific control joint layout — actual spacing should also account for changes in wall height/thickness, openings, wall intersections, and the specific unit's documented shrinkage characteristics (NCMA TEK 10-2 or your local equivalent).
- Maximum spacing used
- 20 ft
- Wall panels between the joints
- 5
- Panel length, as set out
- 19.6 ft
They open the calculator with your figures already in it
Masonry Control Joint Spacing Calculator: 4 control joints — shown in imperial, US market. The link sets both, so the result they see is the one on your screen.
Show calculation logicHide calculation logic
How this was calculated
Formula source(s)
- A commonly-used simplified guideline for CMU control joint spacing: maximum spacing = the lesser of 2x the wall height or 7.6m (25 ft) — actual project requirements vary by wall restraint, panel geometry, and the specific unit/mortar shrinkage properties, per NCMA TEK guidance
Inputs used
- Wall Height
- 10 ft
- Wall Length
- 98 ft
Intermediate steps
- Maximum spacing used
- 20 ft
- Wall panels between the joints
- 5
- Panel length, as set out
- 19.6 ft
Confidence note: This is a simplified general guideline, not a substitute for a project-specific control joint layout — actual spacing should also account for changes in wall height/thickness, openings, wall intersections, and the specific unit's documented shrinkage characteristics (NCMA TEK 10-2 or your local equivalent).
What this calculation does not cover
- The spacing comes from one simplified ratio - twice the wall height, capped at 7.6 m (25 ft) - with no input for horizontal joint reinforcement, unit shrinkage properties, mortar, or how firmly the wall is restrained at its base, ends and top. Published concrete masonry guidance ties the allowable panel length to the crack-control reinforcement built into the wall, and this page takes none.
- The number is interior joints on one straight, uninterrupted run at even spacing. It adds nothing for the joints that stress concentrations demand - at openings, wall intersections and corners, pilasters, changes in wall height or thickness, and changes in foundation support - so a real layout normally needs more joints than this, and in places closer together.
- This is not a structural or fire-rating design. Where the wall is loadbearing, forms part of the lateral system, carries a bond beam or lintel across the joint line, or acts as a fire separation, the position and detailing of every break in the masonry is a design decision, and nothing here takes reinforcement, restraint or a rating as an input.
- Concrete masonry shrinkage only. Clay brick moves the other way, expanding with moisture over time and detailed with expansion joints on different rules, and stone, stucco and concrete slabs are all separate cases with their own spacing logic. Do not carry this count onto a brick veneer, a render, or a slab.
- The ratio has no floor: halve the wall height and the spacing halves with it, so a low garden or planter wall comes back with joints roughly a metre apart or less. The output is also only a count - it says nothing about the joint itself, meaning sash or shear-key units, preformed keys, raked mortar, backer rod and sealant, and where horizontal joint reinforcement is stopped either side.
Estimated cost — your price
This site holds no price list for this material — local prices vary too much to publish honestly. Enter your supplier's price and the result is costed with it.
Part of a bigger job
This trade is one line of a job takeoff. Run the whole job and every other trade comes back with it, off the same measurements.
Computed in your browser — nothing you enter is uploaded. Presented in US customary units and US trade terminology. Where a formula follows a published standard, that standard and its edition are cited beside it on this page; where none governs, the page says so. Local amendments override model codes — verify against the code in force where you build.
Sources checked 2026-09-02 · in the site-wide review of 2026-09-06 · v1.0.1
Regulatory standards & verification citations1
- A commonly-used simplified guideline for CMU control joint spacing: maximum spacing = the lesser of 2x the wall height or 7.6m (25 ft) — actual project requirements vary by wall restraint, panel geometry, and the specific unit/mortar shrinkage properties, per NCMA TEK guidance
Cite this page
Your workspace
Most jobs need more than one number. Add the calculators you need next and they open right here, underneath this one — your figures stay on screen and nothing is lost to a page change.
Tools and safety for this job
To lay block. Generic types, no brands, no prices.
Protection this work requires
- Cutting or grinding concrete, masonry, screed, tile or fibre-cement board releases respirable silica: cut wet or extract at the tool, and wear a P2/N95 respirator at minimum — a nuisance dust mask does not filter it.
- Wet cement and lime burn skin and eyes painlessly until the damage is done: waterproof gloves to EN 374, safety glasses whenever the mix can splash, and never kneel in wet mix in permeable trousers.
- Boards, blocks and bagged material cause most lasting back injuries on small sites: two people or a lifter for full sheets, and never a bag on one shoulder up a ladder.
Show the 6 tools this job needsHide tools
Essential
Brick trowel and jointer
Spirit level
String line and pins
Wheelbarrow
Recommended
Block splitter
Cement mixer
what each masonry tool is for, and the spec that decides which to buy where one does.