
Reading the melt pattern from the drive
The icicles are the least useful thing in the photograph. What matters is the strip of bare shingle they are hanging off, how far up the slope it reaches, and whether the snow above it is still lying unbroken to the ridge. A roof with a clean white cap and a wet grey band along the bottom metre is not losing snow to sunshine. Sun melts from the top down and from the south side first; a house melting itself clears the warm parts of its own ceiling regardless of which way the plane faces, and the north elevation usually shows it most plainly because nothing else is happening there.
Treat the snow as a contact print of the ceiling below it. A bare oval a metre across on an otherwise white plane: a fan housing, a recessed can, or a bath duct blowing into the attic instead of through it. A narrow stripe running eave to ridge: an open chase, or a partition standing open at its top plate. A whole plane dark while the unheated garage bay holds its cover intact: the ceiling is generally leaky, generally shallow, or both. Frost bearding the gable louvre on a still morning says warm wet air is arriving faster than the attic can flush it. Photograph all of it before the thaw erases the evidence, with something in frame to fix the location, because in April nobody will agree where the bare patch was.
Not every dam is self-inflicted, and saying so early saves an argument later. A valley discharging onto a lower roof builds ice at the discharge point however cold the deck is, snow drifted into the lee of a dormer survives several thaws, and bright days at minus five melt an upper slope by solar gain alone. The question worth answering from the drive is narrower than whether ice exists: it is whether this roof is making meltwater out of the house's own heat.
The line the eave has to hold
A snowpack is insulation lying on the outside of the assembly, and it works in the direction nobody wants. Heat arriving under the deck warms the sheathing, the underside of the pack turns to water, and that water runs down the deck beneath an insulating blanket that keeps it liquid. It travels happily until it crosses the exterior wall line and gets onto the overhang, where there is no house underneath and the deck sits at whatever the air is doing. There it freezes. The next melt freezes on top of it, the ridge of ice thickens and creeps up the slope, and behind it a pond forms that stands above the lap line of every course it touches.
That pond is the whole problem. Shingles, tiles and standing-seam panels all shed; they are laps arranged so gravity beats capillary action, and every one of them assumes water in motion. Give a shedding assembly a static head of a few centimetres and it stops being a roof and starts being a shallow tank with fasteners through the bottom. The leak that follows shows up inside as a stain at the exterior wall line, not out on the slope, which is why a homeowner who reports water at the top of a bedroom window is usually describing an eave and not a flashing.
The fix is thermal and it has exactly two levers: stop heat reaching the deck, which is air sealing and insulation depth over the ceiling plane, then flush what still gets there with outside air moving from soffit to ridge. That combination is the cold roof — a deck held near outdoor temperature across its whole area, so what falls on it either stays frozen or leaves as water in one continuous run. The unvented alternative, insulation bonded to the underside of the deck and the roof deliberately kept warm, works too, but it is a different assembly with its own moisture rules and not a retrofit anyone reaches for from a driveway.
Order the two levers correctly and the job stays honest. Ventilation cannot cure a ceiling that leaks warm air; it dilutes what arrives, and dilution loses to a continuous supply. Sealing first, the eave path second, the vent ratio third is the sequence that lets each step be measured. Reversed, the usual outcome is impressive new ridge venting, the same dam, and a colder attic that now condenses on the sheathing because the air still coming up out of the ceiling has somewhere colder to land.
The eave, from the shingles down to the stained ceiling
- Shingles and the eave ice barrier — the shedding surface plus the self-adhered sheet beneath it that has to survive standing water rather than running water, bought against eave length and the distance it must reach inside the wall line Roof Eave Ice Dam Protection Membrane Footprint
- Roof sheathing — the surface whose temperature decides the whole argument; every watt that reaches it from below turns snow into water that will refreeze past the wall line Roof Sheathing Nailing Pattern Nail Count Calculator
- The vent channel and its baffles — a clear run from the soffit intake to the ridge, one baffle per rafter bay, held open above the insulation so outside air can carry away the heat that sealing did not catch Attic Baffle Vent Calculator
- Insulation over the ceiling — thickest out in the field and thinnest exactly where it matters most, because the rafter closes down to nothing at the wall and the heel height is whatever the truss designer gave you Attic Insulation Upgrade Calculator
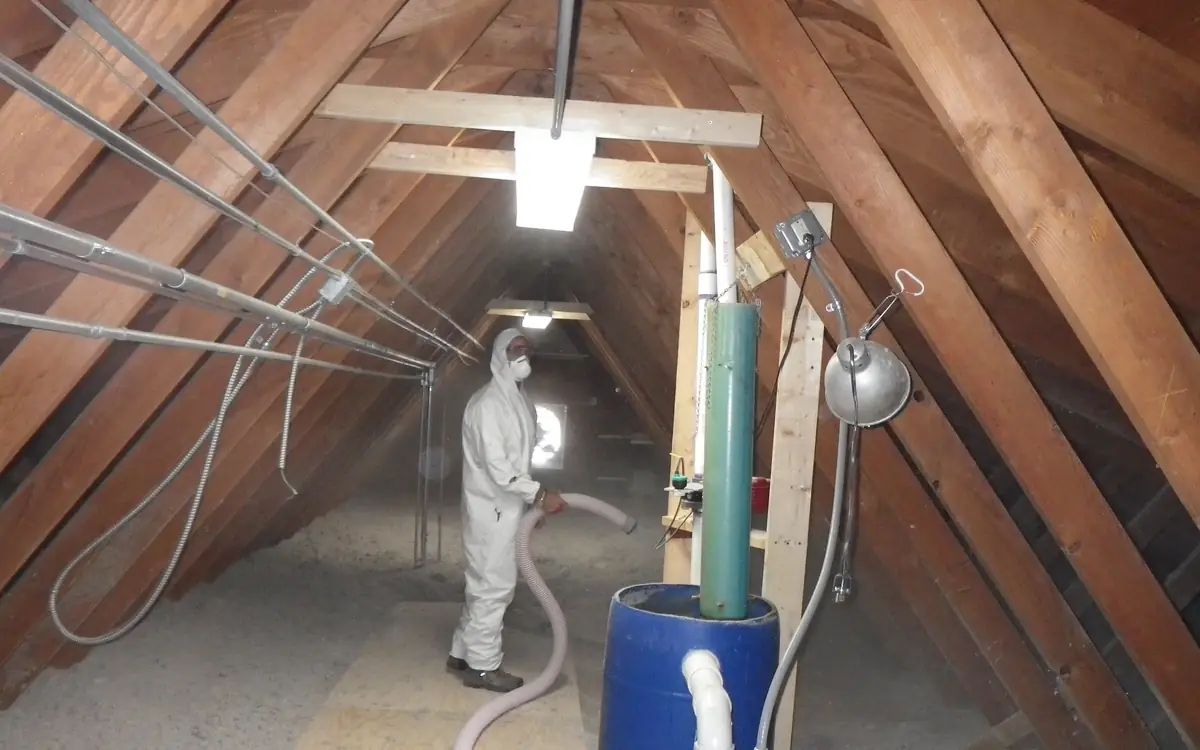
- The sealed ceiling plane — top plates, chases, housings and every wire and pipe through the plasterboard; this is the layer that decides whether the deck above it is warm, and it is quantified from a schedule rather than from floor area Attic Bypass Sealing Material Calculator
- The ceiling of the room below — where the pond behind the dam eventually announces itself, usually as a brown line following the exterior wall rather than a spot out in the middle of the room, and the board that has to come down and go back up Ceiling Plasterboard (Gypsum Board) Sheet Calculator
Following the heat back to where it enters
Heat crosses a ceiling two ways and they leave different marks. Conduction through the insulated field is slow and diffuse: it lifts the whole attic a few degrees and melts the plane more or less uniformly, worst where the depth is thinnest. Air carried bodily through an opening is fast and local: a plume of twenty-degree air lands on one square metre of sheathing and clears the snow above it while the plane either side stays white. The melt map has already told you which you are looking at, and on most houses built before the last two decades the answer is both, with the air doing more of the damage.
For eaves specifically, the openings on and near the exterior wall line outrank everything else, because heat released there has the shortest path to the coldest part of the deck. The exposed joint between the exterior top plate and the ceiling board runs the whole perimeter and is almost never on anyone's list, since unlike a chase it does not look like a hole. Dropped soffits over kitchen units on an outside wall are frequently open straight into the wall cavity, and a balloon-framed partition meeting that wall is the same defect standing upright. Recessed housings within a metre of the wall line put their heat where it does most harm; any not rated for insulation contact and airtight construction needs an enclosure, not a bead of sealant.
Ductwork is a heat source, not a passive part of the building. A supply trunk in a cold attic runs at forty-odd degrees and leaks air already paid for; a disconnected boot over a bedroom is a fan heater aimed at the sheathing. Extract terminating in the attic, or into a soffit that draws it straight back in, adds moisture to the heat and frosts the nail points as a bonus. Mastic and mesh on every joint, insulation to whatever the adopted mechanical or energy code requires, and a duct that genuinely reaches an exterior terminal are ice dam work as much as ventilation work.
One house type breaks all of this and is worth ruling in or out before quoting. A room in the roof — kneewalls, sloping ceiling, a small flat above — has no accessible attic over the eave at all. The insulation sits between the rafters, the vent path is a channel a few centimetres deep that may never have been formed, and the sealing surface is the back of a finished ceiling. Same physics, different access, so it is a different scope: opening the slope, insulating over the deck at the next recover, or accepting a partial improvement and saying so. Pricing that job off an attic method is how a contractor does half of it for free.
What comes out of the walk is a schedule, not an area. Count the chases and measure their openings, tape the top-plate joint including interior walls, measure the dropped soffit runs and their width, tally housings and the annular holes for wiring and pipework, note every flue. That converts into cartridges, foam cans, rigid board and sheet metal — and the flue line is where the material is not negotiable: anything inside the clearance zone takes metal and a sealant rated for the service, with clearances from the appliance listing and NFPA 211 rather than from memory.
Put the walk-round schedule in as it was written down — chase count and opening area, soffit run and width, the full length of exposed top plate, housings, annular holes, flues — and it comes back as tubes, cans, board and metal rather than as a vague afternoon's work.
How many open chases the ceiling plane has — around flues, stacks and ductwork.
The total opening area of those chases, measured on the attic floor.
Total run of dropped soffits over cabinets and baths, plus balloon-framed partitions open at the top.
How wide the open strip is across the run.
Total run of the joint between the top plates and the ceiling board below.
How many recessed light and exhaust fan housings break the ceiling plane.
Across the joint you will actually run a bead around at each housing.
Wires, small pipes and refrigerant lines passing through the ceiling plane.
How many small annular gaps one can of one-part foam will fill.
How many flues or chimneys pass through the ceiling plane.
Across the flue or chimney as it passes the ceiling, at its widest.
The clearance the appliance listing and the adopted code require around this flue.
Sealant tubes required
11 tubes
Perimeters are estimated from areas and runs rather than measured edge by edge, so a schedule of long narrow openings will need more sealant than this shows. Measure the edge directly where a chase is much longer than it is wide.
- One-part foam cans
- 1 can
- Rigid board over chases and soffits
- 61.84 ft²
- Sheet metal at flues
- 1.31 ft²
- Sealed bead run including the cut allowance
- 266.1 ft
They open the calculator with your figures already in it
Attic Bypass Sealing Material Calculator: 11 tubes — shown in imperial, US market. The link sets both, so the result they see is the one on your screen.
Estimated cost — your price
This site holds no price list for this material — local prices vary too much to publish honestly. Enter your supplier's price and the result is costed with it.
What this calculation does not cover
- Fasteners, gaskets, backer rod and the respirator and coveralls the work needs are not counted.
- Nothing here judges whether a housing may be buried; a non-rated recessed can needs a clearance enclosure, which is a rigid-board item rather than a bead.
- Sealing a ceiling over an atmospherically vented appliance can change how it drafts. Retest the appliance after the work, not before.
The last metre, where there is no room to do it properly
Everything about an eave conspires against the detail it needs. The rafter or truss heel closes down toward the wall plate, so the place with the greatest temperature difference and the shortest path to a cold overhang has the least depth available — on a truss bearing straight on the plate, perhaps a hundred and fifty millimetres of clear height and nothing like enough for full depth. Raised-heel trusses solve it and are worth specifying on anything being reframed, but nobody retrofits a heel, so the question is what to do with the room that exists.
Two opposite mistakes are equally common and produce the same call in February. Insulation stuffed hard into the eave blocks the soffit intake, so whatever heat still reaches the attic has no way of leaving and the deck warms. Insulation pulled back from the eave to keep the intake clear leaves the top plate bare, which is the single worst square metre of bare ceiling on the building. The detail has to do both at once: an unbroken air path from the soffit up past the insulation, and insulation carried right out over the plate to whatever depth the geometry allows.
That is what a baffle is for, and it is a component rather than a generic idea. One per vented rafter bay, wide enough to fill the bay so material cannot slump around its edges, fastened well enough that a blower hose at close range does not fold it, and carried far enough up the slope to clear the finished depth by a comfortable margin — a baffle stopping fifty millimetres short of the fill has already failed. Under it goes an eave block or dam, rigid board or a secured batt, so the loose fill has something to bear against and cannot pour into the soffit. Section R806 of the International Residential Code sets a minimum clear space between insulation and the underside of the sheathing at vented locations, and the adopted edition with its local amendments is what the inspector reads.
Skipping bays is not a partial job, it is a hole in the ventilation over that stretch of eave. Air will not detour sideways through a rafter to find the one bay somebody remembered. The count is the eave run divided by the actual measured bay spacing, per plane and per eave, and both the run and the spacing want measuring rather than assuming: trusses drift, hips shorten the run, and a nominal spacing that holds in the middle of the roof rarely holds at the last three bays.
Baffles are a per-bay item, so the order comes off eave run and measured spacing — worth settling before the merchant delivery rather than counting them from the top of a ladder in a respirator.
The length of the eave line where rafter bays need baffles.
The on-center spacing between rafters.
Baffle vents needed
30 baffles (one per rafter bay)
- Attic width
- 39 linear ft
They open the calculator with your figures already in it
Attic Baffle Vent Calculator: 30 baffles (one per rafter bay) — shown in imperial, US market. The link sets both, so the result they see is the one on your screen.
Estimated cost — your price
This site holds no price list for this material — local prices vary too much to publish honestly. Enter your supplier's price and the result is costed with it.
What this calculation does not cover
- The figure covers one eave line, because that is the only length asked for. A gable roof carries a soffit down each long side and needs the calculation run for each, so the 30 baffles returned for a 12 m eave at 16 in centres is 60 for the pair, and a hipped roof has eave on all four sides.
- The result counts bays, not the number of baffle sections a bay swallows. Rafter baffles are commonly sold in sections of about 1.2 m (4 ft), enough to carry the channel over the top plate and the first stretch of loft insulation, so where the vented channel must continue up the rafter — the vaulted assembly described in the FAQ, running soffit to ridge — a 4 m rafter run takes three or four sections in every bay and the quantity to order is that multiple of the number shown.
- Baffles protect an airflow path; they do not create one. Nothing here tests whether the soffit actually has vents in it, or whether their net free area meets the 1:150 or 1:300 attic rule, and a baffle fitted above a solid soffit or an uncut sheathing panel achieves nothing. Intake area also has to be balanced against ridge or gable exhaust before the channel will draw.
- The count says nothing about the depth of the channel a baffle holds open or its height above the finished insulation. A minimum clear air gap between the baffle and the underside of the sheathing is normally required — one inch is the figure most often quoted, but the clearance that applies is set by the code in force — and at a shallow eave that gap plus full insulation depth may not fit beneath the rafter at all, which is a raised-heel truss or insulation-depth question rather than a baffle-count one.
- Dividing the eave length by the rafter spacing assumes parallel, uninterrupted bays for the whole run. Hip corners with jack rafters, dormers, valleys, chimneys and the bay that dies against a gable wall all break that pattern, and the number neither removes bays with no soffit vent below them nor adds the short jack-rafter bays a hip creates.
Intake, exhaust, and the pairs that cancel each other
Ventilation is the second line of defence and only ever the second one: it carries away the heat sealing did not catch, and the moisture with it, on outside air moving from the soffits to the ridge. Section R806 of the International Residential Code sizes it by the familiar ratio — one unit of net free vent area per hundred and fifty of ventilated ceiling area, relaxed to one in three hundred where a vapour retarder sits on the warm side and the openings are split between high and low. British practice takes equivalent guidance from BS 5250 and Canadian figures come through the provincial adoption of the National Building Code; same shape of arithmetic, different numbers and different qualifying conditions.
Net free area is where the estimates go wrong, because it is not the size of the hole. A perforated soffit panel, a proprietary ridge vent and a plain slot in the sheathing all publish a net free area per unit length, and the differences between them are large. Insect screen reduces it further. Two coats of masonry paint over perforated soffit closes it altogether, and it is a genuinely common finding on a house that has been decorated twice since it was built. Check the intake exists before crediting it: half the soffits on ice-dammed houses are either painted shut, filled with insulation, or were never perforated in the first place.
Then look for the pairs that cancel. A continuous ridge vent alongside open gable louvres draws its air from the louvres, which are closer and easier, and the field of the roof stops ventilating even though the vent area on paper looks generous. A powered attic fan on a house with a leaky ceiling depressurises the attic and pulls conditioned air up through it, adding to the heat it was fitted to remove. Intake at least equal to exhaust, one exhaust strategy rather than three, and a genuinely clear path between them beats any amount of vent area bolted onto a roof that short-circuits.
Run the ventilated ceiling area through the ratio the adopted code applies to this house, then check the answer against what the products on the roof and in the soffit are rated to deliver — the gap between those two figures is usually the ventilation problem.
The length of the attic floor, measured along the ridge; the page takes each eave and the ridge to be this long.
The width of the attic floor, wall plate to wall plate across the building.
The rule the vent area comes from: the IRC's ratio, Canada's, or the UK's and Australia's openings along the eaves and ridge.
The intake product, so the page can count it; the slot is a real product rated by its maker.
The exhaust product high on the roof: a ridge vent, or individual roof vents.
Net free vent area needed
6.5 sq ft (net free area)
R806.2 of the 2021 IRC: 1/150 of the attic floor. The code sets no split at this ratio; the page divides it evenly between intake low on the roof and exhaust high up, and keeps the intake at least equal to the exhaust bought, as GAF's balanced-ventilation guidance asks.
- Attic floor area
- 975 sq ft
- Net free area needed
- 936 in²
- Intake, low on the roof (eaves or soffit)
- 475 in²
- Exhaust, high on the roof (ridge or upper vents)
- 468 in²
- Intake as a continuous gap along both eaves
- 0.51 in
- Exhaust as a continuous gap along the ridge
- 1 in
- Intake vent to fit
- 6 vents (8 ft)
- Exhaust vent to fit
- 38 ft
- High-level share of the total
- 50 %
They open the calculator with your figures already in it
Attic and Loft Ventilation Calculator (Intake, Exhaust and Vent Count): 6.5 sq ft (net free area) — shown in imperial, US market. The link sets both, so the result they see is the one on your screen.
What this calculation does not cover
- Net free area is a rating, not a hole size. The counts divide by the rating printed on the product after its louvres, mesh and screens, and assume every vent is open: intake vents painted over, blocked by insulation slumped into the eaves with no baffle, or fitted over solid sheathing count for nothing.
- The shape is a simple gable roof with the ridge along the length. A hip roof has longer eaves and a shorter ridge, a roof with dormers, valleys or a firewall is several vented spaces, and each compartment is worked on its own; the fit checks along the eaves and ridge then need doing by hand.
- The US exception's vapor-retarder condition in climate zones 6, 7 and 8 is taken on trust: nothing here knows the climate zone or whether a Class I or II retarder is in place and continuous. Where either is missing, the 1/300 figure is not available and the 1/150 one applies.
- UK openings are BS 5250's for a cold roof with a high-resistance underlay, as makers restate them, taking the stricter maker at the 35° and 10 m (32.8 ft) boundaries; a breathable underlay, a warm roof, a lean-to or mono-pitch roof, and roofs of buildings other than dwellings each have their own provisions, and the underlay's certificate governs a breathable one.
- Australian openings are Table 10.8.3's, which applies in climate zones 6, 7 and 8 only, applied along both eaves of a dual-pitched roof. The roof space's 20 mm (0.8 in) minimum height, the cathedral ceiling's extra eaves opening, the unsarked tiled roof that needs no openings, and the exemptions for concrete roofs, structural insulated panels and BAL-FZ are the reader's to check against the clause itself.
- This restates a ratio or an opening size; it is not a code check, a moisture assessment or a performance calculation. Air leaking up from the house is usually the bigger moisture source, ember-resistant vents are required in some wildfire areas, and the authority having jurisdiction or building control decides what applies to a given roof.
Three things that stain a ceiling in the same place
A brown line along the top of an upstairs wall has three plausible causes and they need different money spent on them. Water backed up behind a dam gets past the laps at the wall line. Condensation on the underside of a cold deck runs down the sheathing, drips onto the insulation and eventually wets the ceiling. An ordinary flashing or covering failure lets water in where it always would have, the freeze-thaw cycle merely making the season memorable. Timing and geometry separate them faster than a moisture meter does.
Dam backup appears during a thaw and stops when the ice goes, sits at or just inside the exterior wall line, and shows worst at a corner or under a valley discharge where flow concentrates. Condensation appears during and just after a hard cold snap, is distributed rather than local, and brings corroborating evidence upstairs: dark staining across the sheathing, frost or rust at the nail points, damp compressed insulation under the drip line. A covering failure ignores the calendar, repeats in heavy September rain, and traces to a penetration, an abutment or a valley rather than to the eave.
Prove it before rebuilding anything. A pin meter on the sheathing at several points and an infrared sweep across a decent inside-to-outside temperature difference will separate a wet patch from a cold one; thermographic survey of insulation in framed construction is described in ASTM C1060, and the useful part of that practice is the conditions it insists on, since a scan run at a five-degree difference proves nothing. Then photograph the attic before any of it is covered, because once the fill is topped up the next dispute has no exhibits.
| What is seen | Mechanism | Where to look next |
|---|---|---|
| Stain at the wall line during the thaw only | Standing water behind an eave dam getting past the laps | Eave insulation depth over the plate, blocked soffit, bypasses on the perimeter |
| Single bare patch on the snow, no stain yet | Concentrated warm air plume from one opening | Fan housing, recessed can, open chase or a disconnected duct directly beneath it |
| Whole plane melting evenly, ridge included | Conduction through a shallow or patchy insulated field | Measured depth across the field, gaps behind ducts, trodden paths, storage decking |
| Damp compressed insulation mid-slope, dark deck | Condensation on cold sheathing, not a leak | Moisture load below, extract terminating in the attic, short-circuited ventilation |
| Frost on the gable louvre, rust at nail points | Warm humid air arriving faster than the attic flushes it | Ceiling plane sealing first, then intake and exhaust balance |
| Stains that also appear in autumn rain | Ordinary covering or flashing failure | Penetrations, wall abutments and valleys — not the eave detail |
What a new roof can and cannot do about it
A self-adhered ice barrier at the eaves is damage limitation, and it is worth having. It does not stop a dam forming, lower a heating bill or keep the gutters clear; it keeps the water that ponds behind the ice from reaching the deck and the ceiling. Its required extent is set by the adopted code — Section R905.1.2 of the International Residential Code runs it from the eave edge to a line a stated distance inside the exterior wall face, measured along the slope, which means the overhang, the pitch and the wall thickness all feed the quantity. Jurisdictions in severe climates amend that distance upward, low pitches want more of it, and the product itself is specified against ASTM D1970.
The sequence at the eave decides whether the sheet earns its keep. Eave drip edge goes on the deck first with the membrane lapping over it; at the rake the drip edge goes over. Roll it out bottom upward so its own laps shed, keep it flat rather than bridging a dished deck, and respect the minimum application temperature in the manufacturer's printed instructions — a sheet laid at minus two in January is found unbonded in May. The steep-slope volumes of the NRCA Roofing Manual cover the surrounding detailing, and the covering manufacturer's instructions govern where the two disagree in a warranty argument.
Two limits are worth stating to the homeowner before the quote is signed. First, running fully adhered membrane over the whole deck of a vented roof removes that deck's ability to dry upward, which is a hygrothermal decision rather than a belt-and-braces one; it belongs to a designer looking at the whole assembly, not to a crew with spare rolls. Second, gutters do not cause ice dams. A gutter packed solid with ice is downstream of the problem, and taking the gutters off a house that melts its own snow gives you the same dam, forming on the fascia, plus rainwater discharging at the foundation for the other eight months.
Eave length, overhang, pitch and the coverage the jurisdiction demands inside the wall line are what turn the code requirement into rolls, and it is the pitch that catches people out — the sheet is measured along the slope, not across the plan.
The combined length of all eaves requiring ice barrier protection.
The horizontal distance the roof overhangs beyond the exterior wall line.
How far the membrane must extend past the interior face of the exterior wall line, per IRC R905.1.2.
The roof's slope, expressed as rise per 12 units of run — used to convert horizontal coverage distance to along-slope distance.
Ice dam membrane area needed
246 ft²
- Membrane width (along slope)
- 3.73 ft
They open the calculator with your figures already in it
Roof Eave Ice Dam Protection Membrane Footprint: 246 ft² — shown in imperial, US market. The link sets both, so the result they see is the one on your screen.
Estimated cost — your price
This site holds no price list for this material — local prices vary too much to publish honestly. Enter your supplier's price and the result is costed with it.
What this calculation does not cover
- The two horizontal distances above are added at "the wall line", and a wall has thickness. R905.1.2 measures its 24in from the INSIDE face of the exterior wall, while an overhang is normally dimensioned from the OUTSIDE face of the framing or sheathing — so the 150 to 300 mm between those two faces belongs in the membrane width and is in neither box. On a thick wall, or one with exterior insulation, the membrane stops short of the point the code actually names.
- Gives a flat area, and the membrane is bought in rolls of fixed width — commonly 900 mm — that overlap at every side and end lap. The default inputs need a 1.13 m width, which is wider than one roll, so it goes on as two courses with a lap between them, and the sheet area to order runs above this figure by the lap on every seam plus the cut-off at each end of a run.
- Eaves only. The same membrane is normally run up every valley, behind sidewalls and dormer cheeks, around chimneys and skylights, and across any section shallow enough to need it — none of that is in this number, and on a cut-up roof it is often more area than the eaves themselves.
The weight of it, and who should be near it
Ice runs to roughly nine hundred kilograms per cubic metre, and a dam is a solid mass of it on the least supported part of the roof. Two hundred millimetres of ice over a metre of overhang along a ten metre eave is close to two tonnes hanging off the fascia and the rafter tails, with a pond behind it and drifted snow on top. Snow loading is set out in Chapter 7 of ASCE/SEI 7, and the parameter this guide keeps circling appears there as the thermal factor: a cold ventilated roof over a well-insulated ceiling takes a higher factor than a warm one, for the honest reason that it keeps the snow it is given. Fixing the dam raises the design snow load, and on a marginal structure that is an engineer's conversation.
Removal is where the avoidable damage happens. A hatchet or a spade finds the shingles under the ice every time, and that repair costs more than the callout which caused it. Low-pressure steam is the only method that reliably takes ice off a covering without taking granules and tabs with it, and it is worth waiting for. Salt and calcium chloride will melt a channel and will also stain the covering, corrode gutter fixings and flashings, and kill what is planted under the drip line. A roof rake worked from the ground prevents the next dam rather than fighting this one. Nobody should be on a ladder set against an ice-loaded gutter, and anyone paid to be on the roof is working to OSHA 29 CFR 1926 Subpart M or the local equivalent, in February, on ice.
Heat cable is symptom control and deserves to be sold as that rather than as a cure. Where the assembly genuinely cannot be fixed — a converted roof space with no access, a listed building, a chronic valley discharge — a self-regulating cable can hold a drain path open, but only if the path is continuous: through the dam, along the gutter, down the downspout, to a discharge that is itself clear. A cable melting a pool with nowhere to go has built a heavier dam with a heated core. Installation falls under NEC Article 426 for fixed outdoor deicing and snow-melting equipment, the product must be listed for roof and gutter service, and the circuit needs ground-fault protection. A quote that opens with heat cable before anyone has been in the attic is a quote for a different job.
Worth running when the fix will genuinely change how much snow the roof retains, or when someone is proposing to load an eave that is already carrying ice — ground snow load and the thermal factor are the two inputs that move the answer here.
The site's ground snow load, from your local building code's ground snow load map.
Accounts for wind exposure and terrain, which affects how much snow accumulates on the roof versus blows off.
Accounts for heat loss through the roof that can melt accumulated snow.
Based on the building's risk category, per ASCE 7.
Flat-roof design snow load
21.93 psf
They open the calculator with your figures already in it
Ground-to-Roof Snow Load Calculator: 21.93 psf — shown in imperial, US market. The link sets both, so the result they see is the one on your screen.
Add the equipment this sizes
This result is a specification — 21.93 psf — not a quantity. Put the thing it sizes into your project: how many, what you call it, and your supplier’s price.
What this calculation does not cover
- The page returns pf from the equation alone, and ASCE 7 also sets a minimum roof snow load pm that governs instead on low-slope roofs: where the ground snow load is 20 psf (about 0.96 kPa) or less, pm is Is times pg, and above that it is 20 psf times Is. No floor is applied here, so the page's default pg of 1.5 kPa with an exposure factor of 0.9 returns 0.945 kPa, which is 19.7 psf and already below that 20 psf minimum.
- This is the balanced load spread evenly over the whole roof. Drift against a parapet, a roof step or a rooftop unit is a separate ASCE 7 calculation that puts a triangular surcharge over a limited width and can reach several times pf, so a rafter or beam sized on this figure can still be badly under-designed where the snow actually piles up. Sliding snow off an upper roof, and the rain-on-snow surcharge of about 5 psf (0.24 kPa) that applies to low-slope roofs where the ground snow load is 20 psf or less, are added on top of pf rather than contained in it.
- pf is a pressure on the horizontal projection of the roof, not on the sloped surface. Applying it to the true roof area counts the pitch twice: at 6:12 the sloped surface is 11.8 per cent larger than the plan area, so the snow total comes out that much high. Dead loads run the other way and do act on the sloped area, which is why the two are never taken over the same area.
- Ce, Ct and Is are multiplied exactly as typed and are never checked against the tables they come from. Entering Ce as 0.7 rather than 1.0 removes 30 per cent of the load on the strength of a wind exposure that has to hold for the life of the building, and conifers grow, a taller neighbour goes up, a screen wall gets added. The field also accepts Ce up to 1.3, beyond the 1.2 top of the ASCE 7 exposure table that its own help text describes, without objecting.
- The form used here, with a separate importance factor, is the pre-2022 one. ASCE 7-22 rebuilt the snow chapter around reliability-targeted ground snow loads mapped for each risk category and dropped Is from the flat-roof equation, so a pg read off those newer maps and then multiplied by Is of 1.2 applies the risk category twice and overstates pf by 20 per cent. Which edition your jurisdiction has adopted decides which of the two pg values belongs in the box.
Turning a winter of evidence into a scope
By the thaw you should be holding four things: dated photographs of the melt pattern, a written inventory of what is open in the attic, the location and date of every stain, and a note of what the soffits and the ridge actually are. That package turns a sales pitch into a scope. Ask for the work priced in the order the heat travels — sealing, then depth, then the eave path, then venting, then the covering — and ask what each line is expected to change.
Be suspicious of three answers in particular. A proposal that begins and ends with more vents treats the second lever as if it were the first. A reroof that adds membrane and nothing else buys a waterproof deck and leaves the ice exactly where it was. And an offer to fit ridge venting on a house whose soffits are painted shut installs an exhaust with no intake, which will draw its makeup air out of the building. None of the three is dishonest by itself; all three are incomplete, and the melt map you took in February is what lets you say so specifically.
Season the work sensibly. Sealing the ceiling plane is winter-friendly: the attic is cold, the stack pressure driving the leakage is at its strongest, and a smoke pencil or an infrared camera finds openings on a January afternoon that are invisible in July. Blowing insulation follows in any weather. Covering work waits for a clear dry deck at a temperature the adhesives accept. Where a reroof and an attic upgrade are both happening, do the sealing and the baffles first, since the same access serves both.
Then measure whether it worked, twice. A fan pressurisation test before and after, to ASTM E779, turns an afternoon of sealing into a number that either moved or did not, and it is the only part of this work producing evidence at the time. Where naturally aspirated combustion appliances share the envelope, tightening the ceiling means retesting them for spillage, without exception. The second measurement is free and takes a year: stand in the same spot in the drive next February and photograph the same roof. A cold roof holds its snow evenly from ridge to gutter, and that photograph is the proof that convinces anybody.
- Photograph each roof plane from the ground during a hard freeze, before the thaw removes the melt pattern.
- Mark every bare patch and stripe onto a rough plan of the ceiling below, then find out what sits under each one.
- Walk the attic with a bright light and a tape: chases, top-plate runs, dropped soffits, housings, penetrations, flues, and the state of every eave bay.
- Check the soffit intake physically — perforated, unpainted, unblocked — rather than reading it off the elevation.
- Record the heel height and the finished depth, so the achievable depth at the eave is on paper before anyone quotes.
- Seal the schedule, fit the baffles and eave blocks, then top up the field depth, in that order.
- Retest with a blower door, retest any atmospheric combustion appliance, and file the photographs against next winter.
What to carry up the hatch before pricing anything
The February evidence is only half of it; the rest is a tape, a torch and a written schedule. These are the lines that decide whether the eave keeps its snow next winter.
- Bypass schedule for the whole ceiling plane — Chase openings, exposed top-plate run including interior walls, dropped soffit runs and widths, housings, annular holes and flues. Counted and measured, never estimated from floor area.
- Perimeter bypasses listed separately — Anything within roughly a metre of the exterior wall line does disproportionate harm at the eave and is worth pricing as its own line.
- Baffles, one per vented bay, plus eave blocking — Eave run per plane divided by measured bay spacing. Blocking height is set by the finished fill depth, and the achievable depth is set by the heel.
- Intake and exhaust as fitted, in net free area — Record the products, not the openings. Painted-shut perforated soffit and insulation-filled eaves are the two most common findings.
- Heel height and achievable depth over the plate — Write down what geometry allows at the wall before promising an average that only holds out in the field.
- Stain register and pre-cover photographs — Location, date it appeared, and whether it repeated in autumn rain. This is what separates a dam from a flashing and settles who pays for what.
Opens the calculators above on one screen with the dimensions from this article already filled in. Quantities only — this site publishes no price list, because local prices vary too much to publish honestly.