
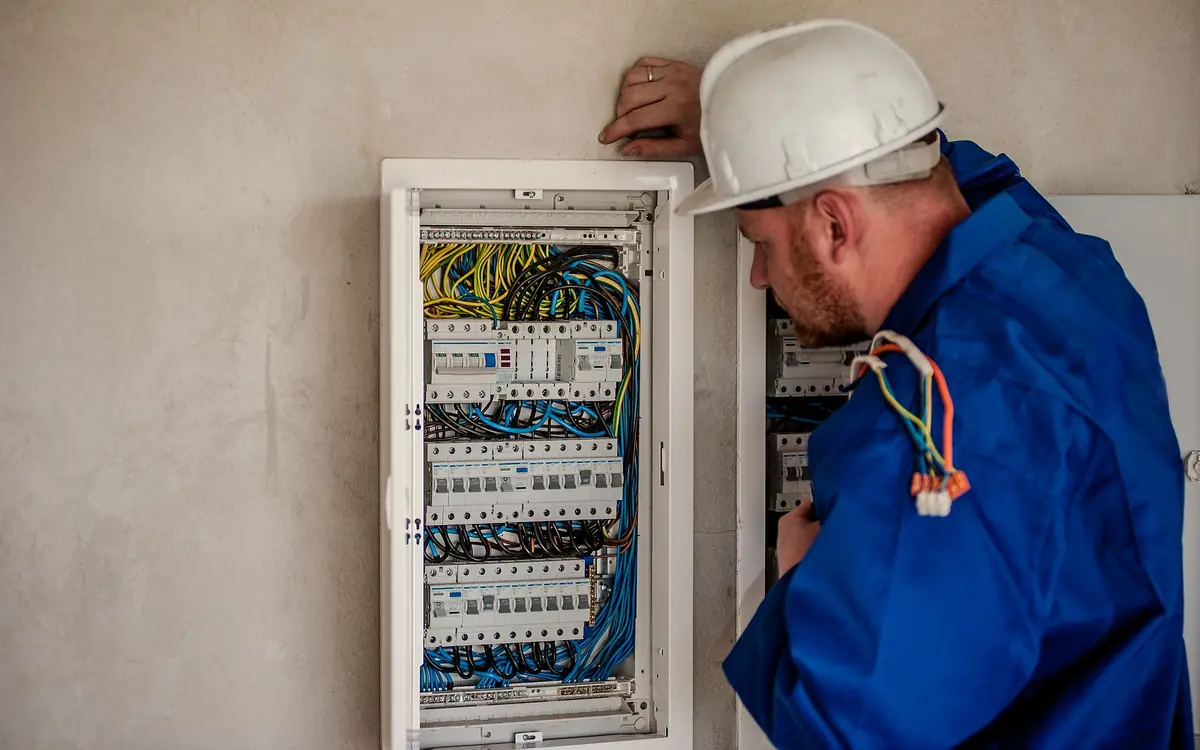
The Job Nobody Priced
The boiler went in on Tuesday, the flue terminal was signed off on Wednesday, and on Thursday somebody screwed a carbon monoxide alarm to the airing cupboard ceiling directly above the case because that was where the ladder already was. Nobody priced that alarm, nobody drew it, and it took four minutes. It is also the only component of the week's work whose failure is silent: a badly sited flue makes a noise or a stain, and a badly sited alarm makes nothing at all until the morning it was needed.
What the appliance work actually did was move the risk. A room that had no fuel-burning appliance in it now has one. A flue that did not exist now crosses a bedroom void on its way to the ridge. A rewire that stripped out four mains-wired heads and left the ceiling roses in place has reduced a house from an interlinked system to nothing, and the customer will not notice, because a dead alarm and a working alarm look identical from a sofa. Every one of those changes invalidates the alarm plan the building had before you arrived, and none of them is on the invoice.
A Count Can Be Satisfied in Entirely the Wrong Rooms
Start by counting, because you cannot audit a house against nothing, and because the arithmetic is the only part of this that takes a minute. Bedrooms and storeys give a defensible figure to walk the house against — and then the walk gives you the number that matters, which is what is actually screwed to the ceilings and how old it is. On a house that has been extended, converted or re-roofed since the alarms went in, the two numbers almost never agree, and the gap is the order.
The trap is that a count can be satisfied entirely in the wrong rooms. BS 5839-6 does not describe a domestic system as a number of heads at all. It describes it as a grade — the class of head, and where its supply and its standby come from — and a category, which is the extent of the dwelling brought under detection at all; and the categories are drawn around what is being protected rather than around square metres. Category LD3 puts detection in the escape routes and nowhere else, which protects the route out and accepts that a fire in a room with the door shut will be found late. LD2 adds the rooms where a fire is most likely to start. LD1 covers essentially everything except bathrooms and WCs. A house with six alarms, all of them in bedrooms and none on the landing, has passed an arithmetic check and has no LD category at all.
Grade is the half a retrofit gets wrong, because it is invisible from the ground. Grade D1 is a mains-powered alarm with a sealed standby supply that lasts the life of the head; D2 is the same alarm with a battery the occupant can take out, which is the failure mode the whole grade exists to describe. Grade F is battery only, again split by whether the cell can be removed. In England the minimum for a new or materially altered dwelling is set out in Approved Document B as a grade and a category together rather than as a head count — and that provision moved in 2022, so read the edition in force rather than the one you learned. Separately, the Smoke and Carbon Monoxide Alarm (England) Regulations 2015, as amended in 2022, put a floor under existing rented dwellings: an alarm on every storey with living accommodation, and a carbon monoxide alarm in any room used as living accommodation containing a fixed combustion appliance, with gas cookers excepted. Scotland reaches further than rented property alone and sets a standard that applies to homes of every tenure, with the Building Standards Technical Handbook describing what an acceptable installation looks like. In North America the equivalent triggers sit in IRC R314 and R315 with NFPA 72 behind them.
Where the heads take their power from is the half of grade a rewire decides, and it is settled at the consumer unit rather than at the ceiling. BS 5839-6 accepts a mains supply either from a dedicated circuit at the origin or from a regularly used lighting circuit, and the logic of the second option is that a dead lighting circuit gets reported the same evening while a dead dedicated way can sit unnoticed for years. Whichever it is, check after a rewire what the alarms actually ended up on, because a house that came back from a rewire with its heads fed from a circuit nobody uses has a system whose standby batteries are quietly doing all the work. BS 7671 governs the installation of that circuit; BS 5839-6 governs which circuit it should be.
Then check the dates, which is the fastest useful thing anybody does on this job. Every head carries a manufacturing date and a replace-by date moulded or printed on the back, and an alarm past it counts towards nothing. A house that appears well covered and turns out to hold eleven-year-old heads is a house with no detection and a reassuring appearance, which is worse than a house with none.
| Category | Where the detection goes | What it is protecting |
|---|---|---|
| LD3 | Circulation spaces forming the escape route — hall, landing, stair | The route out. It accepts that a fire behind a closed door is found only once smoke reaches the hall, which is a deliberate trade and not an oversight |
| LD2 | The escape route, plus the rooms where a fire is most likely to start | The route, plus early warning from the kitchen, the room with the appliance, or wherever the risk was identified — this is the level most appliance work should be pushing a house towards |
| LD1 | The escape route and every room or area in which a fire might start, other than bathrooms and WCs | Property as well as life, and the sleeping occupant in a room where the fire starts. Specified where the risk assessment or the insurer asks for it |
Run bedrooms and storeys through it to get the baseline, then walk the house with the figure on a pad and write down what is actually up there, in which rooms, with what date on the back. The arithmetic cannot see the landing, the category or the age of a single head — its job here is to give the audit something to be short against.
Each bedroom needs its own detector.
Each level of the home needs at least one detector, including a basement whether or not it is finished.
Smoke detectors needed
6 detectors (minimum)
This is a simplified rough minimum, not a code compliance check. NFPA 72 and your local building code have specific, more detailed placement rules (including for hallways, large bedrooms, and rooms with sloped ceilings) — always verify against your local fire code and manufacturer instructions, and consider interconnected detectors so all units sound together.
They open the calculator with your figures already in it
Smoke Detector Placement Calculator: 6 detectors (minimum) — shown in imperial, US market. The link sets both, so the result they see is the one on your screen.
Estimated cost — your price
This site holds no price list for this material — local prices vary too much to publish honestly. Enter your supplier's price and the result is costed with it.
What this calculation does not cover
- Floor area never enters the arithmetic. A 40 m² (431 ft²) storey and a 200 m² (2,153 ft²) open-plan one both get a single alarm, but NFPA 72 and local codes limit how far an alarm can be from the space it protects, so a long hallway, a large open level, or a floor split into separated wings needs more than the one per level this count allows.
- Only one alarm is added outside the sleeping areas, whatever the plan. The calculation cannot see how the bedrooms are grouped, so a home whose bedrooms sit in several separate clusters has to have the total raised by hand.
- This is a device count, not electrical design and not a load calculation. It does not size or check the circuit the alarms sit on, count the interconnect conductors between them, or choose between mains-wired units with battery backup and sealed ten-year battery units — and which of those is permitted usually turns on whether the work is new build or a retrofit.
- Smoke alarms only. Carbon monoxide alarms, a heat alarm in a garage or loft, and detection for anything beyond a single-family home — flats with shared escape routes, houses in multiple occupation, commercial premises — are separate requirements designed to a detection standard, not counted from bedrooms and floors.
- Nothing here accounts for what is already on the ceiling. Alarms carry a service life printed on the unit and are commonly retired ten years from the date of manufacture, so existing units offset this total only if they are in date and of a type your code still accepts.
A Kitchen Wants Heat, and Then the Right Class of Heat
Swapping a smoke alarm for a heat alarm in a kitchen is not a downgrade, it is an admission. A photoelectric head over a hob will be triggered by toast, and an alarm that cries wolf gets twisted off its base within the month — at which point the room has no detection and the ceiling has a bracket. A heat alarm is deliberately blind to smoke and responds to the thing a kitchen fire produces that toast does not, which is a ceiling that gets hot.
What the swap costs is coverage, and this is the part that gets missed on an open-plan retrofit. BS 5839-6 works from a radius on a flat ceiling, and the radius for a heat alarm is materially smaller than for a smoke alarm — 5.3 m against 7.5 m. Squared, that is less than half the floor area per head. One heat alarm in the middle of a knocked-through kitchen-diner covers noticeably less of it than the smoke alarm it replaced, and a galley kitchen with the hob at one end and a utility door at the other can want two.
Class is the second decision and it is set by the temperature the room reaches when nothing is wrong. BS EN 54-5 and BS 5446-2 describe heat detectors by class, each class pairing a maximum ambient the device is designed to live in with the band it must respond within — class A1, the one most domestic heat alarms carry, responding somewhere between roughly 54 and 65 °C. A garage, a boiler room, a conservatory kitchen in July or the ceiling above a hard-run wood stove can all sit closer to that band than the class allows for, and the result is an alarm that goes off on a hot Sunday. Where that is a real prospect the answer is a higher class, not a lower ceiling position, and the class table belongs to the standard rather than to habit.
There is no site instrument in most vans that measures a ceiling's summer maximum, so the honest screen is proportion: how much appliance is in this room compared with how much the room asks for. Set the plate output against the rule-of-thumb output a connected space that size asks for, and a stove or a heater running at two or three times what the room needs is telling you that the ceiling above it will spend the winter well above a normal domestic figure. That is a reason to check the class marking on the head before buying it, and a reason to leave a cheap data logger up for a week if the answer is close. Which appliance suits which room is a purchase decision, and it is argued out properly in the two stove guides linked below rather than here.
Give it the plan dimensions of the space that genuinely shares air and read the recommended output in BTU/hr, then divide the appliance's rated output by that figure. This will not give you a ceiling temperature — nothing on this site will — but a ratio well above one says the room gets driven hard, and a hard-driven room is where an A1 heat alarm and a July afternoon meet.
The length of the area you want to heat.
The width of the area you want to heat.
Colder climates need proportionally more heating capacity per square foot.
Recommended heating capacity (BTU/hr)
23,900 BTU/hr
A rough planning estimate — actual heating needs also depend on insulation quality, ceiling height, and how open the floor plan is to adjacent rooms.
- Space area
- 598 sq ft
They open the calculator with your figures already in it
Wood Stove & Fireplace BTU Calculator: 23,920 BTU/hr — shown in imperial, US market. The link sets both, so the result they see is the one on your screen.
Add the equipment this sizes
This result is a specification — 23,900 BTU/hr — not a quantity. Put the thing it sizes into your project: how many, what you call it, and your supplier’s price.
What this calculation does not cover
- This sizes from floor area alone. There is no ceiling height or volume input, so a vaulted or cathedral room, a double-height space, or a stove on a lower floor with an open stairwell all read the same as a flat-ceilinged room of the same footprint, and all hold considerably more air to heat than this figure assumes.
- Insulation, air-tightness and glazing are not inputs. The climate selector is the only lever in the model, and it moves the answer across the whole 30-60 BTU per square foot band on its own. An uninsulated house with single glazing and a recently air-sealed one of the same footprint in the same town get an identical number here.
- This is a heat-output estimate, not an installation design. It says nothing about clearances to combustibles, hearth and floor protection, flue and chimney sizing, or combustion and make-up air for a tight house. A solid-fuel appliance install is governed by the manufacturer's listing and by local code and has to be inspected on that basis, not on a BTU figure.
- A manufacturer's published maximum output is not directly comparable to this number. Those ratings come from a laboratory test burn on prepared fuel; sustained output on your own cordwood, at your species and moisture content, is lower. Sizing to a peak rating and then damping the stove down to avoid overheating is what builds creosote in the flue.
- A stove is a single point source, and this assumes the heat reaches everything you measured. Closed doors, corridors and rooms off the stove room will stay cold while the stove room overheats, and no allowance is made for fans, ducting or a heat-distribution kit.
One Carbon Monoxide Alarm Cannot Do Both Its Jobs
A carbon monoxide alarm is asked to do two different things and the two want different rooms. One is to find a fault at the appliance early, while the concentration is still local and somebody is awake to act on it. The other is to wake a person who is asleep two floors away from a fault they will otherwise never perceive, because carbon monoxide has no smell, no colour and no irritant warning at the concentrations that matter. A single head cannot be optimal for both, and the standard does not ask it to be: BS EN 50292 contemplates an alarm in the space with the appliance and further alarms in the rooms where people sleep or spend most of their time. On a job where only one alarm is going in, the honest question is which of the two failures you are choosing to accept.
The band the guidance draws around a domestic appliance — a horizontal metre to three metres, with the mounting heights that go with it — exists because both ends of it fail differently, and the layout rules for it are set out in the first-fix guide linked below rather than repeated here. Closer than about a metre and the alarm is inside the appliance's own draught and its refuelling plume; a head three hundred millimetres from a stove's loading door will meet real carbon monoxide every time a log goes in on a still evening, which is not a fault and will nevertheless be treated as a false alarm the third time it happens. Further out than three metres and the sample is a room average, which lags the source badly and lags it worst at exactly the time you want a warning, which is start-up on a cold flue.
The response bands in the alarm standards are the reason this matters more than it looks. BS EN 50291 and UL 2034 both define paired limits at each test concentration — a time by which the alarm must sound, and a time before which it must not — and at low concentrations the must-not is the long one. An alarm sitting at thirty parts per million is required to stay silent for a couple of hours; at three hundred it has three minutes. UL 2034 similarly gives a wide window at seventy parts per million and a narrow one high up. The alarm is deliberately slow at the bottom of its range so it does not sound on cooking or on a passing exhaust, which is exactly what makes an alarm sounding a real event — and exactly what makes a head sited in the wrong sample slow at the moment it is being relied on.
The rooms that are quietly wrong are rarely the obvious ones. A boiler in a cupboard with an alarm inside it and the door shut is an alarm in a box; nobody in the house can hear its sounder through a door and a landing, and the requirement it satisfies is the paperwork rather than the person. A flue that passes through a bedroom void, a loft or the corner of a stud wall on its way to the ridge is a route the products of combustion can enter the house by, at a joint nobody will ever see, in a room with no appliance in it at all — which is precisely where a plan drawn around appliances puts nothing. A room above an integral garage is the same argument with a car in it. And an alarm outside its own stated temperature range in an unheated garage or loft is a device operating outside its specification, whatever the label on the front says.
The last one is unglamorous and it is what actually happens. Alarms get obstructed. A head behind a curtain, above a wardrobe, tucked behind the cistern in a downstairs WC, or inside a cupboard that has since filled with towels is sampling a pocket of still air rather than the room. Sample the room, put the head where the sounder can be heard from a bed with the doors shut, and put the second head where the fault is.
| Where it ends up | Why it was put there | What it costs |
|---|---|---|
| Inside the boiler cupboard, door closed | It is the room with the appliance in it, and the ladder was already there | The sounder is behind a door on a landing. It detects correctly and warns nobody, which is the failure this whole subject is about |
| Directly above the appliance, within a few hundred millimetres | It looks like the most sensitive place available | It samples the appliance's own plume on every refuelling and start-up, and gets written off as unreliable before the winter is out |
| Beside an extract fan, an air brick or an open window | It was the only spare bit of ceiling | The head sits in moving air and reads a diluted sample, so the concentration at the alarm bears no relation to the concentration in the room |
| In every bedroom, none near the flue route | The plan was drawn from the sleeping areas, which is how smoke alarms are counted | A leaking flue joint in a void enters the room the flue passes through, and the plan put nothing in it |
| In an unheated garage or loft | There is a fuel-burning risk in the garage and it seemed thorough | Both are routinely outside the alarm's stated operating temperature range, so the device is running outside specification for months at a time |
The Vent That Keeps the Appliance Safe Also Moves Air Past the Alarm
A permanently open combustion air opening is not a hole, it is a flow path with two ends, and both ends land somewhere an alarm might otherwise have gone. The indoor air method used for a confined space wants two openings, one high and one low, and the size of each follows from the appliance's input rating. Knowing that size is what tells you how seriously to take the air movement: a couple of small grilles feeding a single appliance is one thing, and two openings of a couple of hundred square inches apiece across a plant cupboard is a small ventilation system with a cupboard around it.
The low opening is the supply, and it is the one that matters for carbon monoxide. Outdoor or corridor air arrives there and washes along the floor, so a low wall-mounted head in its path reads that incoming air rather than the room. The high opening is the relief, and air leaves through it — which puts a smoke or heat alarm sited next to it in the position of watching the exit rather than the room, and in the wrong pressure condition it becomes an inlet instead and does the same thing in reverse. Keep both alarms out of the two lines the openings draw, and where the geometry gives you no choice, move the alarm rather than the vent.
This is also the honest answer to the ventilated cupboard. A cupboard with proper combustion air openings is a well-diluted space by design, which is exactly what makes an alarm inside it a poor early-warning device and a good compliance tick. Put the head there if the room requires one, and put the one you are relying on in the space the people are in. How large those openings should be in the first place, and the wide gap between what Approved Document J asks of a solid fuel appliance and what the NFPA 54 and IFGC indoor air method asks of a confined space, is worked through properly in the wood burner guide linked below and is not repeated here.
Put the appliance's total input rating in and it returns the free area per opening under the NFPA 54 and IFGC indoor air method, which needs two of them. Read it here as a measure of how much air is moving through the space and where — not as the final vent size, which depends on which regime governs and on the free area the grille itself actually delivers.
The fuel-burning appliance's total rated input, from its nameplate.
Minimum free area per opening
100 in²
This is the NFPA 54/IFGC indoor air method for a confined space, requiring TWO openings of this minimum free area each (one high, one low). Outdoor air methods use different (typically smaller) sizing factors, and unconfined spaces may not require dedicated combustion air openings at all — confirm which method and space classification applies to your installation with the full code section before finalizing opening size, as this is a single-method screening calculation, not a complete combustion air analysis.
- Free area before the 100 in² floor is applied
- 100 in²
They open the calculator with your figures already in it
Appliance Combustion Air Free Area Calculator (Indoor Air Method): 100 in² — shown in imperial, US market. The link sets both, so the result they see is the one on your screen.
Add the equipment this sizes
This result is a specification — 100 in² — not a quantity. Put the thing it sizes into your project: how many, what you call it, and your supplier’s price.
What this calculation does not cover
- Free area is not the size of the hole you cut. A grille or louver passes only its open fraction — roughly three-quarters for metal, as little as a quarter for wood — and an insect screen behind it takes more again, so a 100 in² (645 cm²) free-area requirement can need an opening of 130 to 400 in² (840 to 2,580 cm²) depending on what covers it. Size from the louver's published free area, or the appliance is starved through an opening that measures correctly.
- The openings only work if the space on the other side is large enough. This method assumes the adjoining room, plus everything freely communicating with it, holds at least 50 ft³ (1.4 m³) per 1,000 BTU/hr (0.3 kW) of combined appliance input; cutting two grilles into the partition of a small closet does not create combustion air, it shares one shortage between two rooms.
- Nothing here accounts for air being pulled out of the space. A kitchen hood, a clothes dryer or a bath fan can drop the room below atmospheric pressure and reverse an atmospheric flue no matter how generous the openings are, which is how a correctly sized opening still ends with a CO alarm — a house with substantial mechanical exhaust needs the appliance's air supply looked at as a pressure balance, not as an area.
Proving It, and Writing Down What Was Proved
The test button on the front of an alarm tests the sounder, the electronics and the battery. On most heads it does not push anything through the sensing chamber, so a head with a chamber full of a decade of dust and cooking grease will pass its button test every week until the morning it is needed. Test the chamber with the aerosol made for the purpose, follow it with an interlink test from each head in turn, and walk the house while somebody holds the button — the point of the walk is to confirm that every other head sounds and, on a radio system, that the head sounding is on the same network as the one triggered rather than the neighbour's. Mixed manufacturers do not interlink, and a house with two makes on two ceilings has two systems that each believe they are complete.
Then hand it over in writing, because everything above is invisible once the ladder is in the van. Record what was fitted, in which room, with the manufacturing and replace-by dates off the back of each head; record that the alarms were proved with the extract running and the interior doors shut, which is the condition a spillage will actually happen in; and record the difference between the two sounds. NFPA 72 uses distinct temporal patterns for fire and for carbon monoxide precisely so that occupants can tell them apart, and the two responses diverge: a fire alarm means leave, and a carbon monoxide alarm means leave, ventilate, and do not go back in to look for the cause. An occupant who cannot tell the patterns apart has an interlinked system and no plan.
- Audit before you buy: room by room, note what is fitted, its type, its grade, and both dates printed on the back.
- Settle the category the house should be at with whoever is signing the work off, and let that decide which rooms gain a head — not the arithmetic and not the spare heads in the van.
- Mark the exclusion footprint around any flue penetration, and the two air paths from any combustion air opening, before choosing positions.
- Fix into framing or a noggin at every position, and check the alarm's stated ambient temperature range against the room it is going in.
- Prove each head with test aerosol rather than the button alone, then prove the interlink from every head, not just from one.
- Repeat the proving with every extract device running and the internal doors closed, since that is the state the building is in when spillage occurs.
- Leave a written record of positions, types, dates and the two alarm patterns, and put the replace-by dates somewhere the occupant will meet them again.
What to settle before a single head is bought
Six lines, and only the second is a decision. The rest are read off something already printed: a tape across the room, the appliance's own plate, the chimney system's installation sheet, the date on the back of the heads that are up there now, and the leaflet in the box the new ones arrive in. The workspace opens on the count so there is something to audit against; everything after it narrows where the heads may go.
- Bedrooms, storeys, and what is actually on the ceilings today — The arithmetic gives the baseline and the walk gives the truth. Write both down, with the date printed on the back of every existing head, before deciding anything is a shortfall.
- The grade and category the house is being taken to — Powered how, backed up how, and covering which rooms. A head count with no category attached can be satisfied entirely in bedrooms, which protects nobody on the landing.
- Outer casing dimension and declared distance for any flue — Both off the chimney system's installation sheet. They give the rectangle of ceiling an alarm base may not occupy, with the distance counted on each side rather than once across.
- Connected floor area, and the appliance's rated output — The ratio between what the room asks for and what is installed is the only cheap screen available for how hot that ceiling runs, which is what picks the heat alarm class.
- Appliance input rating, and where its air openings are — The rating sizes the openings; the openings draw two air paths through the space, and neither is a place to hang anything that samples air.
- Every alarm's stated operating temperature range — Off the leaflet in the box. A garage, a loft and a conservatory kitchen are all routinely outside it, and a device outside its range is not a device the label describes.
Opens the calculators above on one screen with the dimensions from this article already filled in. Quantities only — this site publishes no price list, because local prices vary too much to publish honestly.