
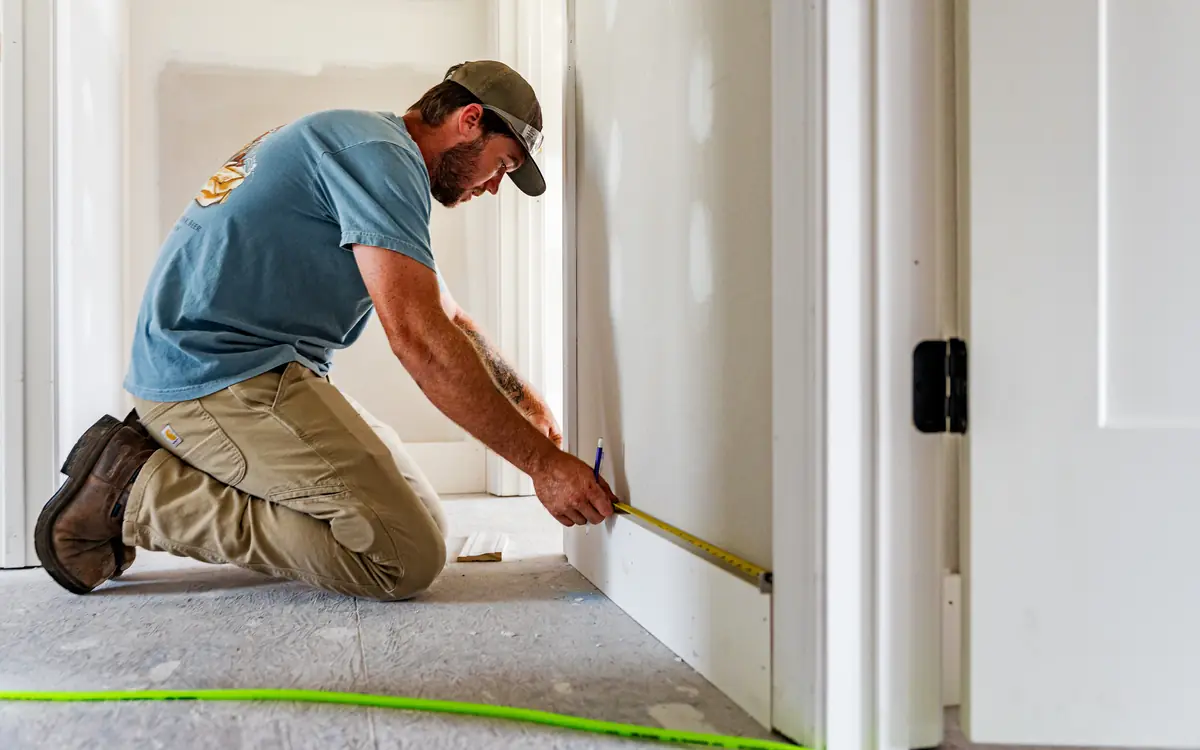
Everything You Mark Today Is Gone by Ten Tomorrow
A rear extension on a 1936 semi: eight metres by five, to be marked on a lawn between a kitchen door and a lap fence, with a bag of pegs, a lump hammer, a thirty-metre tape and a can of line marker. The machine is booked for half past seven. Nothing about the next four hours produces anything a client can look at, and almost everything that goes wrong over the following three weeks gets decided in them.
What makes setting out a building different from squaring a floor or marking a court is that the marks do not live to see the work finished. Corner pegs sit precisely where the bucket is going. A string pulled across the plot is in the way of the tracks, the spoil heap and the barrow run, and the first person to trip over it will pull the peg out and stand it back in roughly the right place. So the day's real product is not the corner pegs. It is a ring of profiles standing back beyond the machine's reach, each holding the lines in a form that can be restrung tomorrow morning, again after the dig, and again in a fortnight when the bricklayer turns up to find every mark on the ground gone.
The cost of a mistake climbs by an order of magnitude at each handover. Found this afternoon, it is a peg moved with a hammer. Found by the driver tomorrow, it is an hour and a load of arisings. Found at the foundation inspection it is a wall. Found by whoever sets the steel, it is the extension. That gradient is why setting out is a slow job done by somebody unhurried, and why every dimension that matters gets taken twice, by the same person, with the same tape.
The Line on the Drawing Is Not the Line You Peg
Before a peg goes in, settle what the dimensions on the sheet are measured to. On a domestic drawing the plan dimension is very often to the outer face of the outer leaf, while the engineer's foundation section dimensions a trench that is wider than the wall and centred on something else again, and the structural grid — if there is one — runs through neither. Get that convention wrong by half a brick and the error is not half a brick: it propagates through the trench line, the cavity tray and every internal dimension the client will later measure. ISO 7078, which sets out the vocabulary and procedures for setting out and surveying in building construction, exists largely because these words are used loosely on site and precisely on drawings.
The other family of lines has nothing to do with the building at all. The distance to the boundary, the room for the eaves and the gutter to overhang without crossing it, the position of the drain run and whether the footprint clips a public sewer that would need a build-over agreement — all of those are set today, and all of them are cheaper to resolve with a tape and a phone call than with a completed wall. Peg them as their own strings and label them, because a boundary offset check that lives only in somebody's head is not a check.
| Line | Taken from | What moves if it is wrong |
|---|---|---|
| Outer face of the outer leaf | The plan dimension, which on most domestic drawings runs to this face rather than to the structure behind it | The whole building. Every other line on the profile is an offset from this one, so an error here is invisible because everything agrees with it |
| Trench edges | The footing width on the engineer's section, centred on the wall unless that section says otherwise | Concrete volume, and the eccentricity of the load if the trench is dug off-centre under the wall it carries |
| Inner leaf and blockwork line | The wall build-up as detailed: outer leaf, cavity, insulation, inner leaf | Every internal dimension, which is the set of numbers the client checks with their own tape |
| Boundary offset | The title plan and the planning drawing, reconciled against the fence, wall or hedge that is actually there | Gutter overhang, scaffold rights and access for the render coat — an argument no tape wins after the event |
Proving the Base Before the Machine Believes It
A tape will cheerfully agree with all four sides of a shape that is not a rectangle. Shove one corner sideways and you have a parallelogram: the two long sides are still equal to one another, the two short sides likewise, every one of them still reads its drawn dimension, and the building leans. Nothing you can do along the edges separates the two shapes. Only the two corner-to-corner measurements do, which is why they are taken before any side dimension is treated as meaningful.
The check is sensitive in the useful direction. On the eight-by-five base, corner to corner is 9.434 m. Slide the far side ten millimetres along the long axis — both far corners together, which is how a base racks — and one diagonal lengthens while the other shortens, so the tape reports a difference of roughly seventeen millimetres: the fault comes back magnified rather than diluted. Move a single corner instead and only the diagonal from that corner changes, by about eight and a half millimetres. That amplification is what makes the reading worth taking on a base small enough that a ten-millimetre skew is entirely invisible to the eye and entirely obvious to a bricklayer six courses up.
Diagonals audit; they do not create. The first right angle has to be manufactured, and the argument is all about the size of the triangle used to do it. A mark placed three millimetres off on a four-metre leg is an angular error of about three quarters of a milliradian: harmless where it stands, six millimetres out by the time the wall has run eight metres, fifteen by the time it has run twenty. Strike the same triangle at six, eight and ten metres and that identical three-millimetre slip is halved before it is ever multiplied. Take whatever legs the plot will hold — over the flower bed if necessary, since the marks are temporary — rather than the small triangle that fits comfortably on the mown grass.
Almost no garden extension is set out from a survey grid. It is set out from the back of the existing house, and the back of the existing house is ninety years old, bowed, and not square to the boundary. Measure it before you trust it: pull a line along the wall and read the gaps, and you will usually find fifteen or twenty millimetres of belly across a six-metre elevation. Then decide, deliberately, which two points define your base line — normally the two the new wall has to meet cleanly — and accept that the far end of the extension will not be parallel to the fence and square to the house at the same time. Choosing which of those two the client sees is a decision; discovering it at brickwork stage is not.
The tape is an instrument with a published tolerance, not a ruler. A class II tape under OIML R 35-1, which covers material measures of length for general use, is permitted about 0.3 mm plus 0.2 mm per metre — 6.3 mm on a thirty-metre blade with nothing done wrong at all. Steel expands roughly 11.5 micrometres per metre per degree, so the same blade used at five degrees before breakfast and twenty-five degrees on a south-facing wall in the afternoon shifts about seven millimetres over that length; the ISO 8322 series sets out how to establish what an instrument is really delivering. The practical consequence is smaller than the theory, because both errors are systematic: one tape at one tension for every dimension on the plot beats a better tape borrowed halfway through.
The error nobody budgets for is the ground. Drawn dimensions are horizontal, and a tape laid on grass is not. Pull eight metres down a garden that falls half a metre across that run and the horizontal distance you have actually marked is 7.984 m — the peg is sixteen millimetres short of where the drawing wanted it. On a plot falling one in ten, ten metres of tape on the ground puts a peg fifty millimetres out, and the two ends of the same building will be wrong by different amounts because the fall is never even. Step the measurement in short horizontal bays with a plumb bob and a spirit level, or work from a levelled line, and take the diagonals the same way you took the sides.
- Line the existing wall and read its bow, then pick the two points on it that define the base line.
- Strike the base line and peg it long at both ends, well beyond where the building stops.
- Set the right angle at one end with the largest 3-4-5 the plot will accept, marking the legs on the line rather than in the air.
- Peg the two far corners at their drawn dimensions, measured horizontally in stepped bays rather than along the slope.
- Read both diagonals with the same tape at the same pull, and swing one far corner until they agree.
- Re-read all four sides only now, and write the four numbers and both diagonals on the drawing before anything else happens.
Put in the base side and the side to the far corner and it returns the diagonal the tape should read and the largest 3-4-5 that fits on them; then enter the diagonal you actually read, or how far apart the two diagonals came out, and it gives the corner's angle and how far, and which way, the far corner has to move.
The side you hold fixed, measured from the corner: usually the longer side, or the one set off an existing wall.
The second side, running from the same corner and meant to be square to the base line.
A single diagonal across one corner, or the two diagonals of a four-cornered layout.
The tape reading from the end of the base side straight across to the end of the other side.
Diagonal when square
30.79 ft
The diagonal reads longer than the square figure, so the corner is open — more than 90° — and the far end of the second side has to swing towards the far end of the base line by the distance in the last row. Swing it on the tape from the corner so the side keeps its length, then read the diagonal again; two or three rounds of swinging and re-reading usually settle it.
- Squaring triangle: leg along the longer side
- 20 ft
- Squaring triangle: leg along the shorter side
- 15 ft
- Squaring triangle: diagonal between the two marks
- 25 ft
- Measured diagonal less the square figure
- 2.48 in
- Angle at the corner
- 90.85 °
- Corner out of square by
- 0.85 °
- Move the far end of the second side by
- 2.94 in
They open the calculator with your figures already in it
Squaring Calculator for Layout and Setting Out (3-4-5 Rule): 30.79 ft — shown in imperial, US market. The link sets both, so the result they see is the one on your screen.
What this calculation does not cover
- Every figure here is a horizontal distance. A tape laid on sloping ground reads the slope, which is longer than the plan distance, so on a falling site take the sides and the diagonals in level steps or along a level line; otherwise the diagonal disagrees with the square figure on a corner that is in fact square.
- Take every reading with the same tape, at the same pull and from the same marks — the centre of the pin or the nail in the profile, not the edge of a peg. Two tapes, or one tape pulled differently, can disagree by more than the error being looked for.
- The single-diagonal check assumes the two side lengths were measured from the same corner point to the same two marks the diagonal runs between. If the sides are not the lengths entered, the corner angle and the offset describe a different corner.
- Equal diagonals prove a rectangle only together with equal opposite sides, and the two-diagonal shift assumes that the opposite sides are equal — that the shape has racked as a parallelogram rather than been pegged at four independent wrong lengths.
- The 3-4-5 triangle shown is the largest that fits on the two sides from the corner. A bigger one is better still: if the lines can be pegged long past the corners, scale the triangle up beyond the building and mark the legs on the lines themselves, never in the air.
- No tolerance is applied. How far out a corner may be is set by the job's specification or the tolerance standard it follows; the page reports the error and leaves the judgement to that.
Profiles Are the Only Marks That Survive
A profile is two pegs and a crossboard, and the whole of its value is in where it stands. Drive 50 by 50 pegs until they stop ringing and start thudding, nail a board across them with its top edge dead level, and cut a saw kerf or drive a nail for every line that has to be held. The setback is not a matter of taste: it is decided by how far the excavation will batter back, where the spoil will stand and where the tracks will run. Get it wrong and the profile goes over on the first pass, leaving a board full of accurate marks describing a position that no longer exists.
Profiles come in pairs because a line needs two ends. Every string is pulled between a kerf on one profile and its opposite number across the plot, and the corner of the building is not a mark on the ground at all — it is the point where two strings cross, dropped to the ground with a plumb bob whenever it is needed. That is the property that makes the arrangement worth the timber. Any single string can be taken down for the machine and restrung identically; any single profile that gets flattened can be rebuilt from the two that survive, by pulling the surviving lines and reading where they cross. A corner peg has none of that.
Two habits separate profiles that work from profiles that get argued over. Write on the board what each kerf means — wall face, trench edge, inner leaf — in something that survives rain, because by Thursday there will be three nails in that board and nobody will remember which is which. And set every crossboard on the site to one common height, checked with a level rather than assumed from the ground, so that the whole ring doubles as a horizontal datum you can measure down from anywhere on the plot.
- Decide the setback from the batter of the dig and the spoil position, not from where the timber happens to reach.
- Drive pegs in pairs a little wider apart than the lines they will carry, so a kerf never lands on a peg.
- Level the crossboards to one common height across the whole site and check that height back to the datum.
- Transfer each line from the ground pegs onto the boards, and cut the kerf only once you have read it twice.
- Label every kerf on the board itself, then pull the corner pegs out before the machine can find them for you.
Level Is Half the Setting Out and the Half That Gets Left Until Tuesday
Position is two dimensions and the drawing has three. Pick the datum before anything else vertical happens, and pick something that will still be there and still be at the same height at the end of the job: a manhole cover, a bolt set into the existing brickwork, a course of the existing DPC. Not a peg in a lawn that a machine will pass within a metre of. Where the drawing carries reduced levels rather than relative ones, those numbers refer to a national vertical datum — Ordnance Datum Newlyn in Britain, NAVD 88 in the United States — and someone has to establish the link between that datum and your temporary benchmark on the plot, once, in writing.
Transfer the level with whatever you have, and prove the instrument before you trust it. An optical level that has drifted out of collimation gives beautifully consistent readings that are all wrong by an amount proportional to sight distance, and the two-peg check — reading a pair of points from midway between them, then from beside one of them — finds it in ten minutes. The ISO 17123 series sets out the formal field procedures for testing levels and total stations, worth knowing about on the day an argument over a level stops being casual. On a small extension a clear water level in a hose still settles corners as honestly as anything electronic, needs no calibration and does not care that the fence is in the way of the line of sight.
What the vertical setting out actually controls is a chain of things that all have to work at once. Finished floor level sets the threshold, and the threshold sets whether the door is level with the patio or a step above it. In England the Approved Document C guidance to the Building Regulations puts the damp-proof course at least 150 mm above the finished external ground, which quietly sets a floor level that the client's preferred flush threshold may not tolerate without a drainage channel. The trench depth comes off the same datum, and so does the invert of the new drain run and the fall from it to the existing inspection chamber. That last one is the number that most often forces the whole floor level up, and it is far better discovered on a plot with a tape in your hand than on a site with a slab already poured.
Founding depth itself is not a setting-out decision. Set out for the trench you were given, and expect the depth to be settled in the trench against the ground actually found — on a plot with mature trees on shrinkable clay, often well below whatever the drawing showed.
Where the Curved Edge Actually Lands
The curved end of the terrace exists on the drawing as three things you cannot stand on: a radius, a centre point marked with a small cross, and two tangent points where the curve becomes a straight line. On a garden plot the centre regularly falls inside the existing kitchen, under the shed, or four metres into next door. Even where it can be reached, a trammel swung across a lawn that will shortly hold a spoil heap has a short working life. So the curve gets set out the way road curves have always been set out when the centre is unavailable: peg the long chord between the two tangent points, then step along it and measure the offsets from that chord out to the curve.
Those offsets are pure geometry and they are not small. Take a terrace edge on a six-metre radius turning through nine metres of arc. Set check stations a metre and a half apart around the curve and the straight chord between two adjacent stations is 1.496 m — four millimetres shorter than the arc — while the curve bulges 46.8 mm clear of that chord at its midpoint. Six stations fall on the arc, it turns through just under eighty-six degrees, and the single chord from one tangent point to the other is 8.18 m against 9 m of arc. Every one of those is a number you can put a tape on before anything is dug.
Read the two together and they tell you different things. A chord between stations that measures short means the pegs have crept — somebody has moved one, or the stations were stepped along the chord line instead of around the curve. An offset that measures high means the arc you struck is tighter than the one on the drawing, which usually means the radius point was wrong rather than the striking. Where the curve runs into a straight, check only as far as the tangent point: past it the ground is a straight line and will fail an arc check for entirely the right reason. Mark the tangent points as their own pegs off the chord, because a curve faired in by eye at the transition reads as a kink from the far end of the garden, which is exactly where the client stands to look at it.
Station spacing is also a decision about how the curve is dug, not only about how it is checked. On that six-metre radius, pegs at three-metre stations leave 187 mm of curve standing off the straight line between them: the driver will cut a polygon and be perfectly entitled to say he followed the marks. At one-metre stations the same bulge is 21 mm, which is within the width of the bucket teeth and reads as a curve. Set the stations close, join them with line marker rather than string — a curve pegged in string is a series of straights, and the paint is still visible when the string has been walked through — and accept that a curved edge is simply more setting-out labour than a straight one.
Give it the radius from the drawing, the length of curve you are actually setting out, and how far apart you want the check stations. It returns the chord between adjacent stations and the offset from that chord to the curve, which are the two tape readings that prove a struck arc before the machine touches it.
The radius the arc is supposed to have been struck at.
The distance along the arc from one check point to the next.
How much of the curve you are checking, measured around it.
Mid-ordinate at each station
0.8348 in
A chord reading short against these figures means the pivot moved or the trammel shortened; a mid-ordinate reading high means the radius struck was tighter than the design. The two together tell you which.
- Chord between adjacent stations
- 3.5 ft
- Check stations that fall on the arc
- 11 stations
- Angle the arc turns through
- 101.57 degrees
- Chord across the whole arc
- 34.09 ft
They open the calculator with your figures already in it
Arc Chord and Mid-Ordinate Check Calculator: 0.8348 in — shown in imperial, US market. The link sets both, so the result they see is the one on your screen.
Add the equipment this sizes
This result is a specification — 0.8348 in — not a quantity. Put the thing it sizes into your project: how many, what you call it, and your supplier’s price.
What this calculation does not cover
- Arcs longer than a semicircle are reported at the clamp, where the chord equals the diameter — check such a curve in halves instead.
- This proves the curve against its own radius. Whether the pivot was in the right place is a separate check, made from the goal or the datum rather than from the arc.
The Circle Nobody Is Allowed to Dig In
Some of the day's setting out marks ground the machine must never reach. Retained trees are the usual case, and the protected circle around one is not advisory: it is a no-dig, no-track, no-store and no-mixing zone, and it goes in before the plant arrives rather than after. The radius is not something to judge from the crown. It comes from the arboricultural report for the plot, which derives it under BS 5837:2012, Trees in Relation to Design, Demolition and Construction, from the diameter of the stem. Read the radius off the report, and where the tree is multi-stemmed use its figure rather than reasoning about it on site.
What the fencing contractor needs is not the radius but the distance around the circle. A stem of 500 mm gives a six-metre protected radius on the usual single-stem basis: twelve metres across, and 37.7 m of fence line to close it. Divide that by the panel length your supplier actually delivers rather than by the length you remember, because the last gap in a ring of rigid panels is the one that gets left open. In practice the circle is rarely closed anyway — it is cut by the boundary, by the house, or by a drive that has been there forty years and has already limited what the roots did. Measure the arc you genuinely have to fence and take the rest off, but mark where each truncation stops on the plan, because that decision belongs to the arboriculturalist rather than to whoever is carrying the panels.
Striking the circle is the one job on the plot where the centre is not a point. It is a tree. Take two perpendicular measurements across the stem to find its middle, mark that on the ground on both axes, and swing the radius from there with a tape — walking it round and dropping a peg every couple of metres, closer where the ground is uneven. Then set the fence line outside the marks rather than on them, since a post driven on the line is a post driven inside the protected ground.
Feed it the diameter of the circle, which is twice the protected radius from the report, and it gives the run around the outside — the number that turns into a panel count and an order, and the number to measure the truncated part back off.
The diameter of the round object.
Circumference
11 ft
- Radius
- 1.75 ft
They open the calculator with your figures already in it
Circumference Calculator: 11 ft — shown in imperial, US market. The link sets both, so the result they see is the one on your screen.
Estimated cost — your price
This site holds no price list for this material — local prices vary too much to publish honestly. Enter your supplier's price and the result is costed with it.
What this calculation does not cover
- Only a diameter is asked for, and the answer is that one figure multiplied by pi — nothing on the page distinguishes an outside diameter from a bore. Insulation, cladding, banding and protective wrap all run round the outside, so entering a pipe's inside diameter shortens the result by pi times twice the wall, roughly 38 mm (1.5 in) on a 6 mm (0.24 in) wall.
- Circumference rises in step with the diameter rather than with its square, so a tape reading five per cent over returns a wrap length five per cent over and nothing in the arithmetic averages that away. A tape laid across a post that misses the true centre reads short of the diameter, and that shortfall is carried through at full size.
- Pi is applied to whichever single width was typed, which only describes a true circle. A squashed duct or a buttressed trunk measured across its widest point comes out longer than the real path around it, and measured across its narrowest comes out shorter, with no second measurement asked for that could catch either.
- The value is the exact closing path around the circle, with no lap, seam allowance or tail included, and there is no overlap or waste field to add one. Strapping, spiral wrap, jacketing and cable ties are all cut longer than the girth they close on, and how much longer is left entirely to the person ordering.
- Each layer of a wrap sits on top of the one below it, so only the first turn runs round the diameter entered here. Lagging a pipe means working from the pipe outside diameter plus twice the insulation thickness, and one circle is drawn at the figure given with nothing added for the material's own build-up.
- The radius in the breakdown is half the diameter entered, put through the same conversion — a restatement of the measurement rather than a check on it. It confirms nothing about whether the object is truly round or whether the tape passed through its centre.
What the Driver Actually Needs at Half Past Seven
Hand over a plot, not a puzzle: strings coiled on the profiles they belong to, the lines transferred to the ground in marker, boards labelled, and every offset written on the drawing so anybody can restring the plot without you. Then say out loud which lines are the building and which are the exclusion zones. A driver told that the circle round the tree is a service run will treat it very differently from one told it is a no-dig area.
The check that matters is not the one you did on the surface. It is the one at the bottom of the trench, before concrete: restring the profiles, plumb down to the trench, and measure the width against the footing schedule and the depth against the crossboards with a traveller. Deviation has published numbers behind it rather than opinions: ACI 117 covers tolerances on American concrete work, while BS 5606 and the acceptance criteria in ISO 4463-1 frame accuracy and setting out in British and international practice. Have the relevant one to hand before the conversation, not during it. Do not climb into anything deep to take a reading; excavation entry is governed work, under OSHA 29 CFR 1926 Subpart P in the United States and equivalent national regulation elsewhere, and a dimension can be taken from the top with a plumb bob and a staff.
Close the day by recording it. Photograph each profile with a tape in the frame and the labels readable, write the two diagonals and the four sides on the drawing with the date, and note where the datum is and what it reads. Six weeks later, when somebody asks why the flank wall sits 40 mm off the boundary, that sheet is the difference between a five-minute answer and a survey.
- Coil each string on its own profile so the plot can be restrung in the order it was set out.
- Spray both trench edges, not a centreline, and spray the exclusion circles in a different colour.
- Walk the marks with the driver and name every line before the first bucket.
- Restring and plumb down to check width and depth at the bottom of the trench, from the top of the excavation.
- Photograph the profiles with a tape in shot, and write the diagonals, the sides and the datum reading on the drawing.
Its fields are labelled for a sports court, but the arithmetic is any rectangle's. Give it the base's two sides and the corner offset your tolerance allows, and it returns how far apart the two diagonals may read before the base is out — the figure to write on the drawing beside the diagonals themselves, before anyone argues about the trench.
The long dimension of the rectangle being set out.
The short dimension of the same rectangle.
How far the 3-4-5 right-angle triangle is scaled up before it is struck.
How far one corner may sit off its true position along the long axis.
Expected diagonal
104.2 ft
Equal diagonals prove the figure is a rectangle, and only then do the side dimensions mean anything. Hold the two within the difference shown rather than within the rulebook's dimensional tolerance.
- Diagonal difference at the permitted offset
- 0.35 in
- Short leg of the squaring triangle
- 12 ft
- Long leg of the squaring triangle
- 16 ft
- Hypotenuse of the squaring triangle
- 20 ft
- Perimeter of the rectangle
- 282 ft
They open the calculator with your figures already in it
Court Diagonal and Squaring Triangle Calculator: 104 ft — shown in imperial, US market. The link sets both, so the result they see is the one on your screen.
What this calculation does not cover
- A tape reading is a temperature reading as well. Use one tape at one tension for both diagonals, and note the surface temperature outdoors.
- This proves the rectangle. Arcs, keys and circles are struck from points established off it and carry their own checks.
What to have proved before the machine is booked
Six numbers that all get settled with a tape on a quiet afternoon, and all get expensive the moment anything is dug. The workspace opens on an eight-by-five base with a five-millimetre skew allowance — replace both with the dimensions off your own drawing.
- The two diagonals, and the difference you will accept between them — Take them with one tape at one pull, stepped horizontally if the plot falls. Four correct sides prove nothing on their own; a parallelogram has four correct sides too.
- Squaring triangle scaled to the plot, not to the lawn — Whatever legs the ground will hold. A three-millimetre slip on a four-metre leg is six millimetres eight metres away, and half that on an eight-metre leg.
- Slope correction on every dimension over about five metres — Half a metre of fall across an eight-metre run leaves a peg sixteen millimetres short if the tape lies on the grass, so the building comes out undersized. Step it in horizontal bays.
- Profile setback measured off the batter and the spoil — The board has to be outside the dig, outside the tracks and outside where the arisings will stand. A profile knocked over on the first pass has no value at all.
- Chord and offset for every curve, at the station spacing you will actually peg — Pegs three metres apart on a six-metre radius leave nearly 200 mm of curve unmarked between them, which is a polygon by the time it is dug.
- Exclusion circles set out and fenced before the plant arrives — Protected radius from the arboricultural report, circumference for the fence order, and the truncated length taken off where the boundary cuts the circle.
Opens the calculators above on one screen with the dimensions from this article already filled in. Quantities only — this site publishes no price list, because local prices vary too much to publish honestly.