Materials & Quantities

Gypsum Plaster Brown Coat Volume Calculator

Calculate the plaster volume needed for a brown (leveling) coat, the second layer of a three-coat plaster system.

  • Answers as you type
  • Every formula cited
  • Calculated in your browser
SettingsSettings for this calculationUS
Market
Imperial · sales tax
The total area to receive the brown coat.

Use the same area as the scratch coat beneath it — the brown coat is applied over the full scratch-coated surface.

The applied thickness of the brown coat.

The brown coat levels and straightens the wall over the scratch coat, and is typically thinner than the scratch coat, commonly around 6 mm.

Brown coat plaster volume

49.87 gal

High confidence

The brown coat is the coat that makes the wall flat and plumb, and it carries most of the thickness. It is where the material goes, and its cure is what governs when the finish can follow.

Equivalent volume
0.25 yd³
Then change the inputs to see how far the answer moves.

Show calculation logic

How this was calculated

Formula source(s)

  • Three-coat plaster system volume per coat = wall area × coat thickness; the brown coat levels the surface and is typically thinner than the scratch coat (commonly ~6 mm)

Inputs used

Wall/Ceiling Area
320 sq ft
Brown Coat Thickness
0.25 in

Intermediate steps

Equivalent volume
0.25 yd³
Final result49.87 gal

Confidence note: The brown coat is the coat that makes the wall flat and plumb, and it carries most of the thickness. It is where the material goes, and its cure is what governs when the finish can follow.

What this calculation does not cover

  • THE BROWN COAT IS THE LEVELLING COAT, so its thickness is set by how far out the background is rather than by a specification. A wall straight to within a few millimetres takes the nominal thickness; a wall out by 15 mm (0.59 in) over its height takes whatever it takes, and the average is the only figure that matters to the order.
  • Material lost to the floor is real and is not a percentage. Plaster that falls off the hawk or the trowel on a scratch-and-brown job is gone, and on a rough background it is a substantial share of a bag.
  • Suction governs how much stays on. An unprimed, highly absorbent background pulls water out of the mix and changes both the working time and the thickness that can be hung in one pass.
  • Excludes the scratch coat below and the finish coat above, which have different thicknesses and different coverage rates.
  • Does not allow for over-thickness where the substrate is out of plane, which on an uneven background can add substantially to the quantity.
  • Cure time before the finish coat is a programme item, and rushing it is a recognised cause of finish-coat crazing.

Estimated cost — your price

This site holds no price list for this material — local prices vary too much to publish honestly. Enter your supplier's price and the result is costed with it.

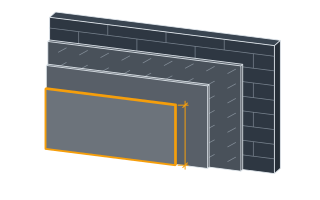
brown coat 0.25 inbrown coat 6.35 mmscratch coat

Computed in your browser — nothing you enter is uploaded. Presented in US customary units and US trade terminology. Where a formula follows a published standard, that standard and its edition are cited beside it on this page; where none governs, the page says so. Local amendments override model codes — verify against the code in force where you build.

Sources checked 2026-08-26 · in the site-wide review of 2026-09-06 · v1.0.0

Regulatory standards & verification citations1
  1. Three-coat plaster system volume per coat = wall area × coat thickness; the brown coat levels the surface and is typically thinner than the scratch coat (commonly ~6 mm)
Cite this page

Your workspace

Most jobs need more than one number. Add the calculators you need next and they open right here, underneath this one — your figures stay on screen and nothing is lost to a page change.

Tools and safety for this job

To skim a plaster finish. Generic types, no brands, no prices.

Protection this work requires

  • Wet cement and lime burn skin and eyes painlessly until the damage is done: waterproof gloves to EN 374, safety glasses whenever the mix can splash, and never kneel in wet mix in permeable trousers.
  • Most fatal falls on small jobs are from under three metres: use a tower or a ladder tied at the top, and never work off the top two rungs.
Show the 4 tools this job needs

Essential

  • Mixing bucket or tub

  • Paddle mixer

  • Plastering trowel and hawk

Recommended

  • Step ladder

what each plastering tool is for, and the spec that decides which to buy where one does.

Now that you have the number

These guides cover the work this quantity is for — the first ones run this calculator inside the section that raises the question.

  • Hole spacing, cream volume per metre, what the drying wait is really for, and why the replaster over an injected course is a salt specification.

  • Plastering Over Artexuses this calculator

    A textured ceiling takes a skim, an undercoat or a new sheet of board depending on one lab result and one depth gauge reading — not on the primer.

  • A coat-by-coat field guide to render and plaster: reading what the background drinks, and keeping every coat weaker and thinner than the one beneath it.

The data behind it: Production rates by operation

How to calculate gypsum plaster brown coat volume in 3 steps

  1. Wall/Ceiling AreaThe total area to receive the brown coat.
  2. Brown Coat ThicknessThe applied thickness of the brown coat.
  3. Brown coat plaster volumeThe tool computes the brown coat plaster volume from those figures and shows the formula, its sources, and a confidence rating alongside it.

Brown coat plaster volume by wall/ceiling area

Page defaults, not your figures above.

Wall/Ceiling AreaBrown coat plaster volume (gal)
200 sq ft29.5
300 sq ft44.2
400 sq ft58.9
500 sq ft73.6
600 sq ft88.4

Frequently asked questions

Why does this quantity move so much on an old wall?
Because the brown coat is the one that makes the wall flat, and every hollow it fills is material the arithmetic cannot see from the area alone. On a true background it sits at close to its nominal thickness; on a bellied or a wandering wall it can take half as much again, all of it in the low spots. This is the coat that is rodded to a plane and left rough for the finish, so it is where the wall stops being lumpy — and the reason to check the background with a straightedge before ordering rather than after, because the answer is not a percentage on top of the area, it is a depth that varies across it.
What is the brown coat actually doing?
Making the wall straight. The scratch coat below is a keyed bond layer and the finish coat above is thin and decorative — neither can correct a plane. The brown coat is rodded off to a straight, plumb surface, which is why it carries most of the total thickness and why an out-of-plane background consumes far more of it than the nominal figure suggests.
How long before the finish coat can go on?
Long enough for it to have cured, not merely dried at the surface. Applying a finish over a green brown coat means the two shrink at different rates, which shows up as crazing across the finished surface within weeks. Manufacturer data gives a minimum, and cool or damp conditions extend it — this is a programme constraint, not a preference.
Does the substrate change the quantity?
Considerably. A flat, true background takes close to the nominal thickness; a wall that is fifteen millimetres out over its height needs the brown coat to absorb that deviation, and the extra material is real. Dubbing out the worst of it in a prior operation is usually cheaper and performs better than making one thick coat do the work.
Should it be keyed for the finish?
Scratched or floated to a suitable texture, yes — a glassy brown coat gives the finish nothing to grip. The texture required depends on the finish system, and a coat closed up too smooth is a common cause of a finish that delaminates in sheets rather than adhering.
Preliminary estimate, not certified engineering. This tool produces an indicative quantity calculation for planning purposes only — it is not a certified structural analysis, a guaranteed material takeoff, or a substitute for building department approval. Always verify measurements on-site and have a licensed contractor or structural engineer review any load-bearing, code-sensitive, or safety-critical work before purchasing materials or starting construction. Spotted an arithmetic or standards error? Report it to contact@craftquantities.com with your inputs — a confirmed fix gets a permanent check of its own, so the same mistake cannot come back.